Securing cloud infrastructure for PCI review
DeveloperSteve Coochin
2022年3月3日
0 分で読めますThe PCI certification process is quite comprehensive and relates to infrastructure, software and employee access to systems, in particular to datasets and the way that they are accessed. These checks are critical not only to the wider payments industry but also to create a level of trust with users knowing their data is protected. The PCI compliance process is a number of checks, usually by an accredited third party, to ensure that secure data handling processes are in place.
In this blog post, we’re going to take a look at how you can secure your cloud infrastructure to be PCI compliant.
What are PCI compliance requirements?
The Payment Card Industry Data Security Standard, also known as PCI DSS, is a set of industry regulated guidelines to help keep cardholders’ sensitive data secure. The standard is maintained by the PCI Security Standards Council who govern all the nuances of the standard which covers everything from compliance regulations to accreditor vendors for PCI DSS certification.
The PCI compliance requirements cover a range of points, particularly covering all aspects of the software development lifecycle (SDLC). A full comprehensive list is available here. At a high level the requirements are:
Installing and maintaining a firewall configuration to protect cardholder data. The purpose of a firewall is to scan all network traffic, block untrusted networks from accessing the system.
Changing vendor-supplied defaults for system passwords and other security parameters. These passwords are easily discovered through public information and can be used by malicious individuals to gain unauthorized access to systems.
Protecting stored cardholder data. Encryption, hashing, masking and truncation are methods used to protect cardholder data.
Encrypting transmission of cardholder data over open, public networks. Strong encryption, including using only trusted keys and certifications reduces risk of being targeted by malicious individuals through hacking.
Protecting all systems against malware and performing regular updates of antivirus software. Malware can enter a network through numerous ways, including Internet use, employee email, mobile devices, or storage devices. Up-to-date antivirus software or supplemental antimalware software will reduce the risk of exploitation via malware.
Developing and maintaining secure systems and applications. Vulnerabilities in systems and applications allow unscrupulous individuals to gain privileged access. Security patches should be immediately installed to fix vulnerabilities and prevent exploitation and compromise of cardholder data.
Restricting access to cardholder data to only authorized personnel. Systems and processes must be used to restrict access to cardholder data on a “need to know” basis.
Identifying and authenticating access to system components. Each person with access to system components should be assigned a unique identification (ID) that allows accountability of access to critical data systems.
Restricting physical access to cardholder data. Physical access to cardholder data or systems that hold this data must be secure to prevent the unauthorized access or removal of data.
Tracking and monitoring all access to cardholder data and network resources. Logging mechanisms should be in place to track user activities that are critical to prevent, detect or minimize the impact of data compromises.
Testing security systems and processes regularly. New vulnerabilities are continuously discovered. Systems, processes and software need to be tested frequently to uncover vulnerabilities that could be used by malicious individuals.
Maintaining an information security policy for all personnel. A strong security policy includes making personnel understand the sensitivity of data and their responsibility to protect it.
Infrastructure-specific PCI requirements
Looking at the more comprehensive list in finer detail, in this post we are specifically going to look at the points which touch more on infrastructure as part of the SDLC.
1.3 Prohibit direct public access between the Internet and any system component in the cardholder data environment.
As we know from previous vulnerability breaches, this point highlights the need to make sure that vulnerabilities and misconfiguration do not allow for unauthorized access to core databases, alternatively this can also relate to things like session or user accessible components being accessed.
2.2.2 Enable only necessary services, protocols, daemons, etc., as required for the function of the system.
2.2.4 Configure system security parameters to prevent misuse.
2.2.3 Implement additional security features for any required services, protocols, or daemons that are considered to be insecure.
5.1.1 Ensure that antivirus programs are capable of detecting, removing, and protecting against all known types of malicious software.
5.2 Ensure that all antivirus mechanisms are maintained as follows:
Are kept current
Perform periodic scans
Generate audit logs which are retained per PCI DSS Requirement 10.7.
5.3 Ensure that antivirus mechanisms are actively running and cannot be disabled or altered by users, unless specifically authorized by management on a case-by-case basis for a limited time period.
Fortunately, all of which can be easily automatically checked for at the click of a few buttons and easily integrated into process flows pipelines with a free Snyk account.
Streamlining PCI review with Snyk Container and Snyk IaC
One thing I always love is automation, and for PCI compliance this means setting up some good security scanning inside your CI/CD pipelines. This can help in a few ways, including generating logs and identifying vulnerable points in infrastructure.
There are a few ways to set up security scanning with Snyk. Let's look at some examples using Google's ecommerce microservices-demo.

Direct from the repository
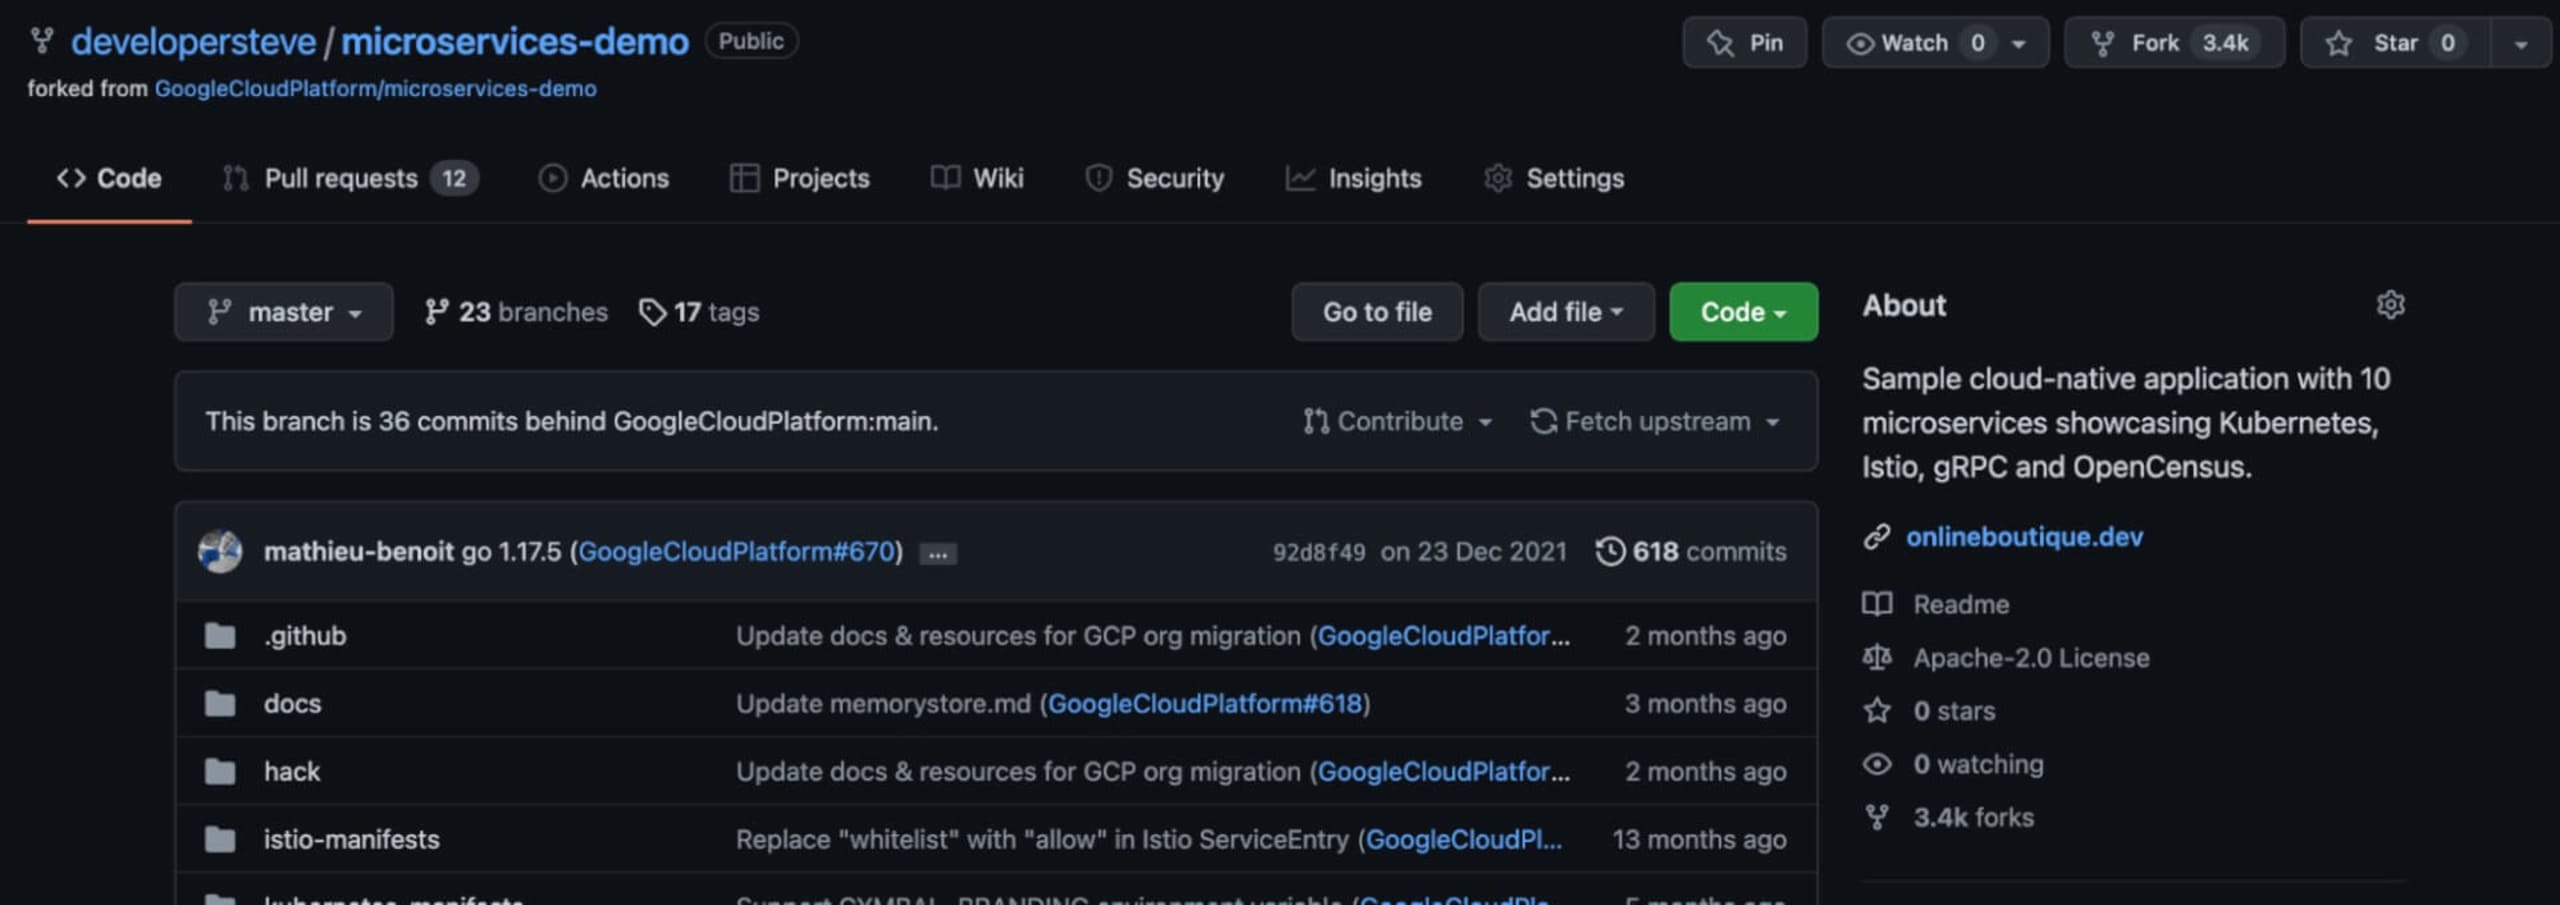
If you’d like to follow along, you can start by forking the microservices-demo repo.
Forking code directly into your GitHub account is an easy way to build on platforms. It makes it easy to then customize as needed into branches during development. It also means you can clone into local development environments to test and run code.
Security scanning with Snyk
There's a few ways to then test the code from here. One option is to use the Snyk CLI from the project root. With this approach, you can use snyk test to run a localized tests or snyk monitor to provide ongoing monitoring for vulnerabilities.
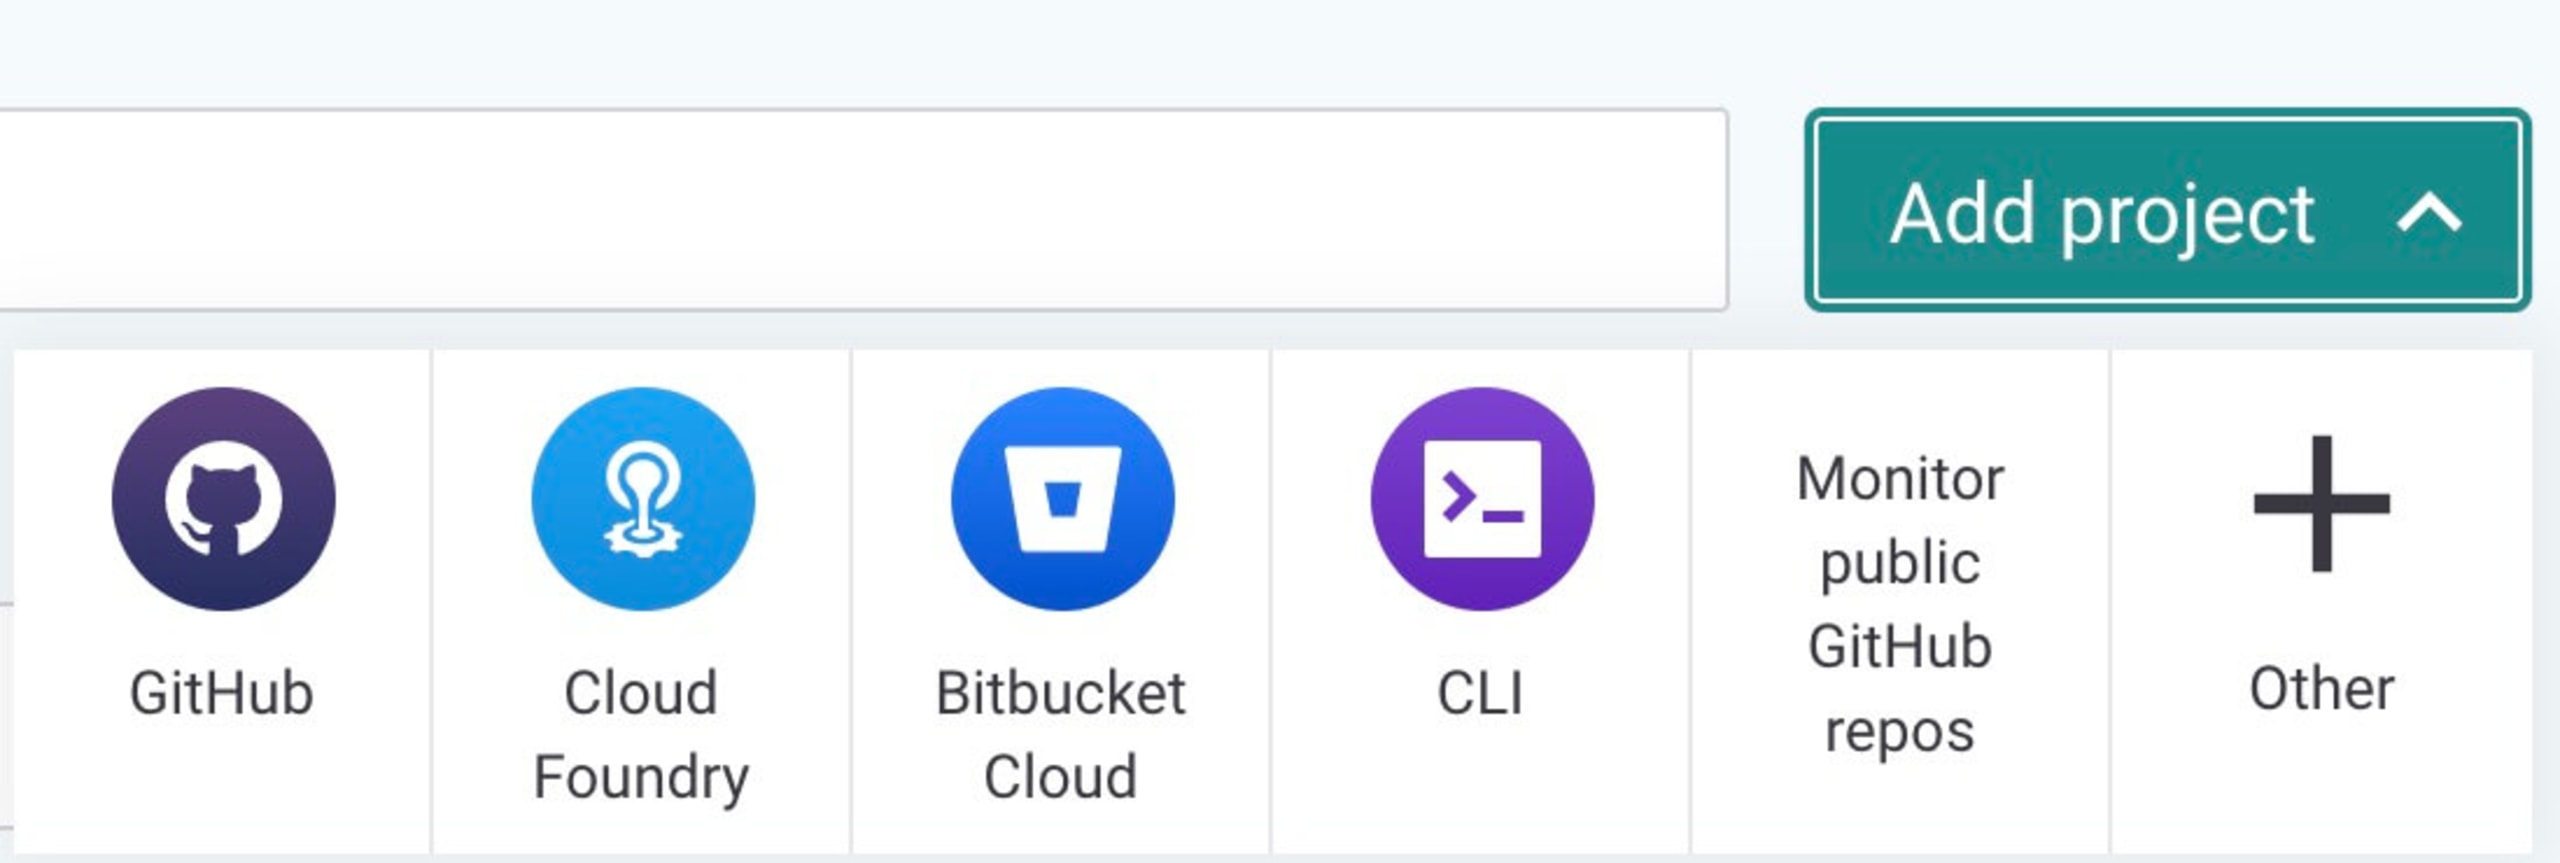
You can also connect that forked code repository directly to the Snyk app using the Snyk GitHub integration. To do so, log into your Snyk account and click on the Add Project button from my Snyk dashboard. There's a variety of integration options available to choose from via the quick add project menu, or you can click on Other and search for your Git platform of choice.
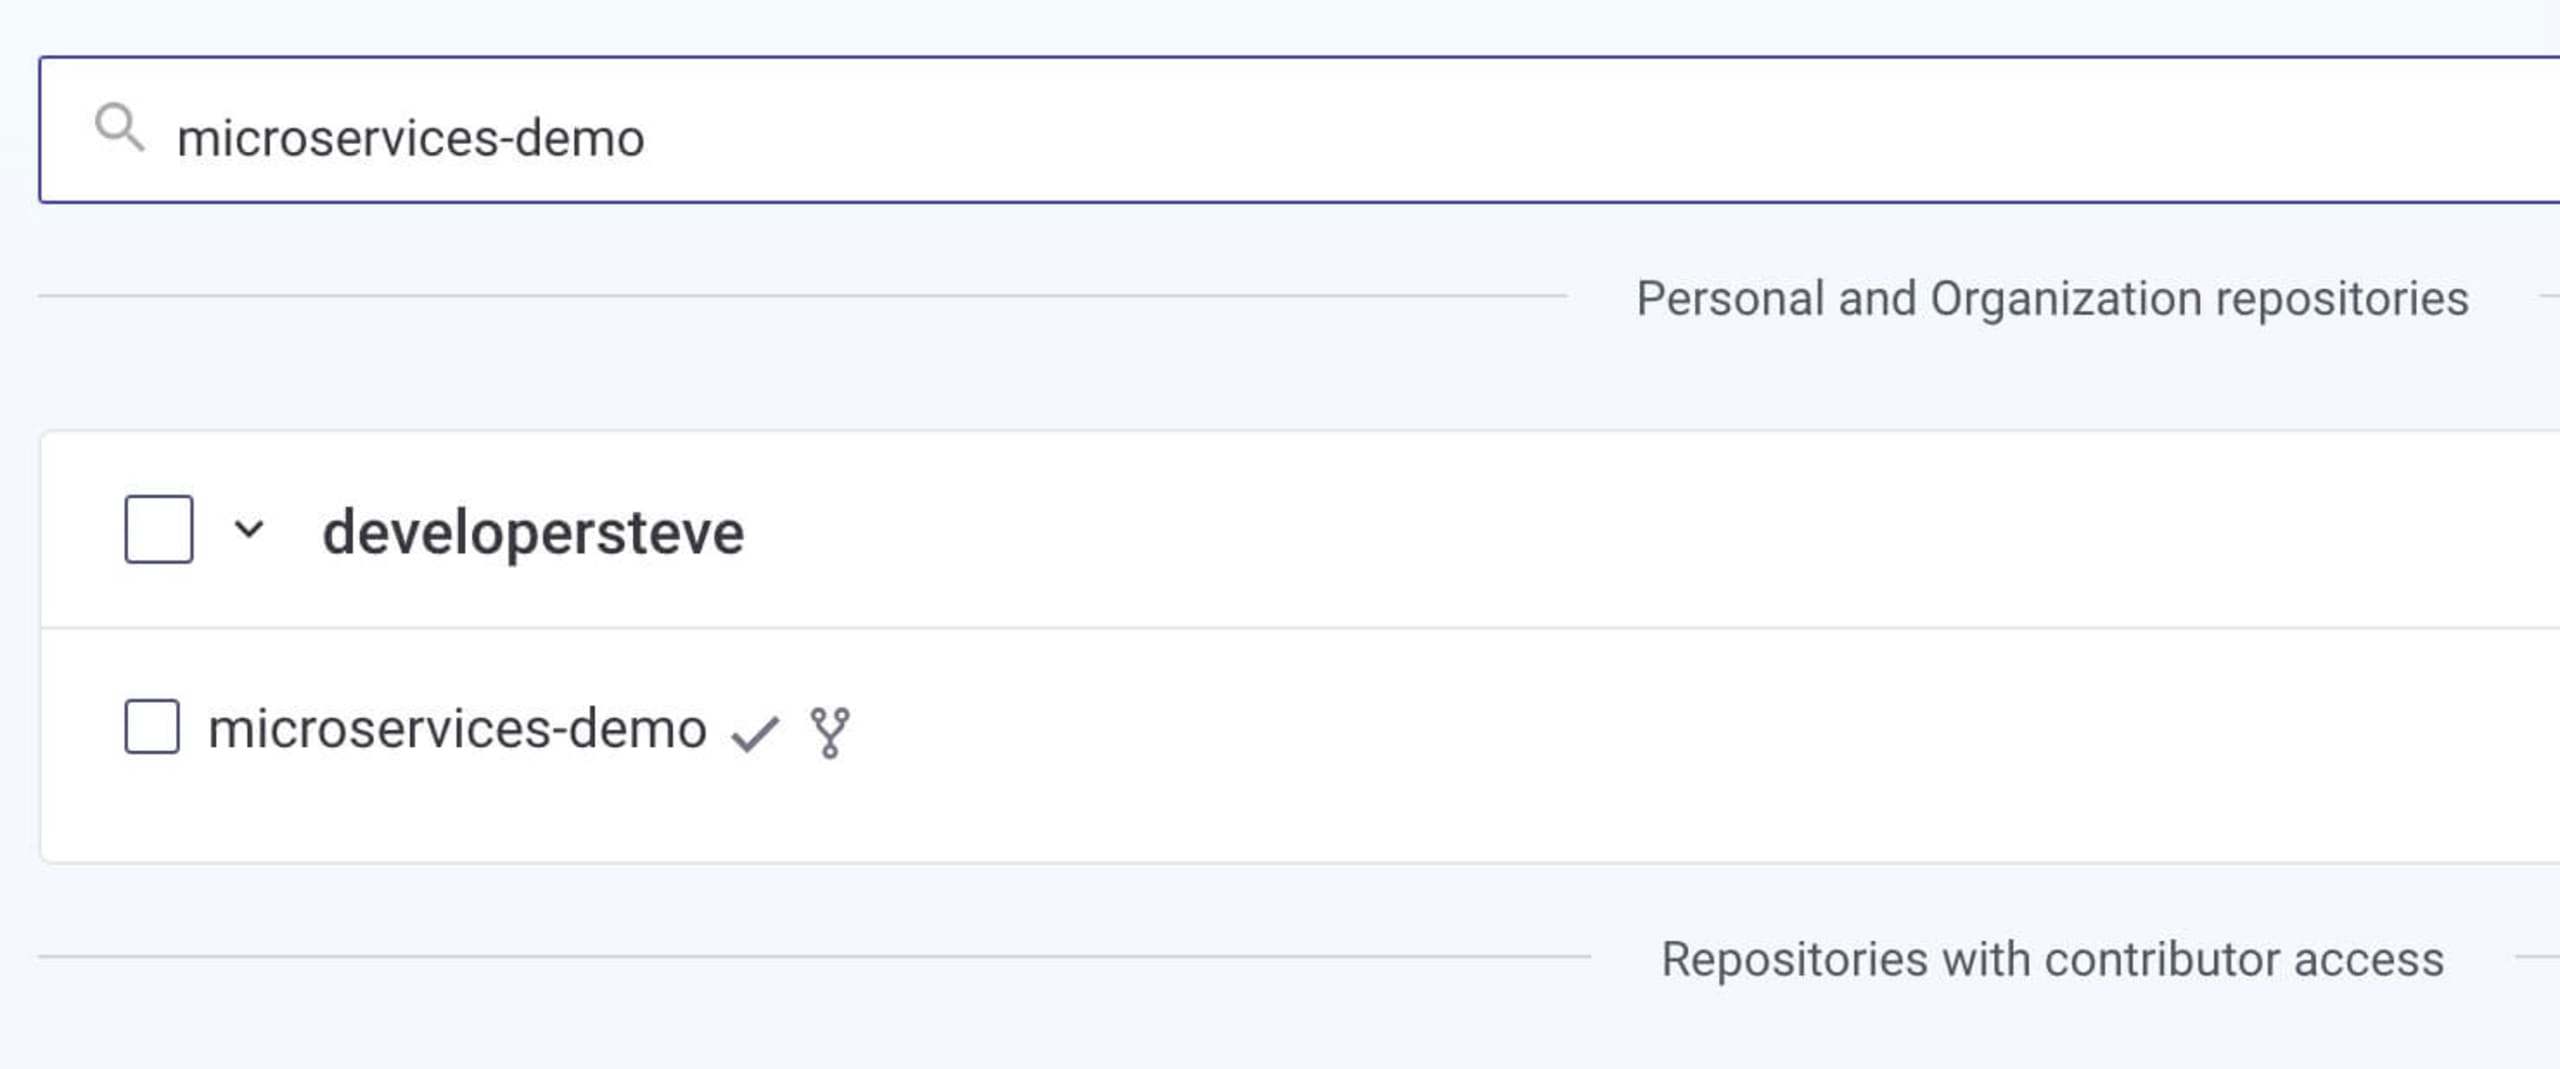
Once you’ve connected the integration for GitHub, you can then search for the forked microservices-demo repository and start an initial scan.
Once selected, the repository will be continually scanned and will show any detected issues. This will break down the issues into different line items for each component of the project. This helps for further investigation.
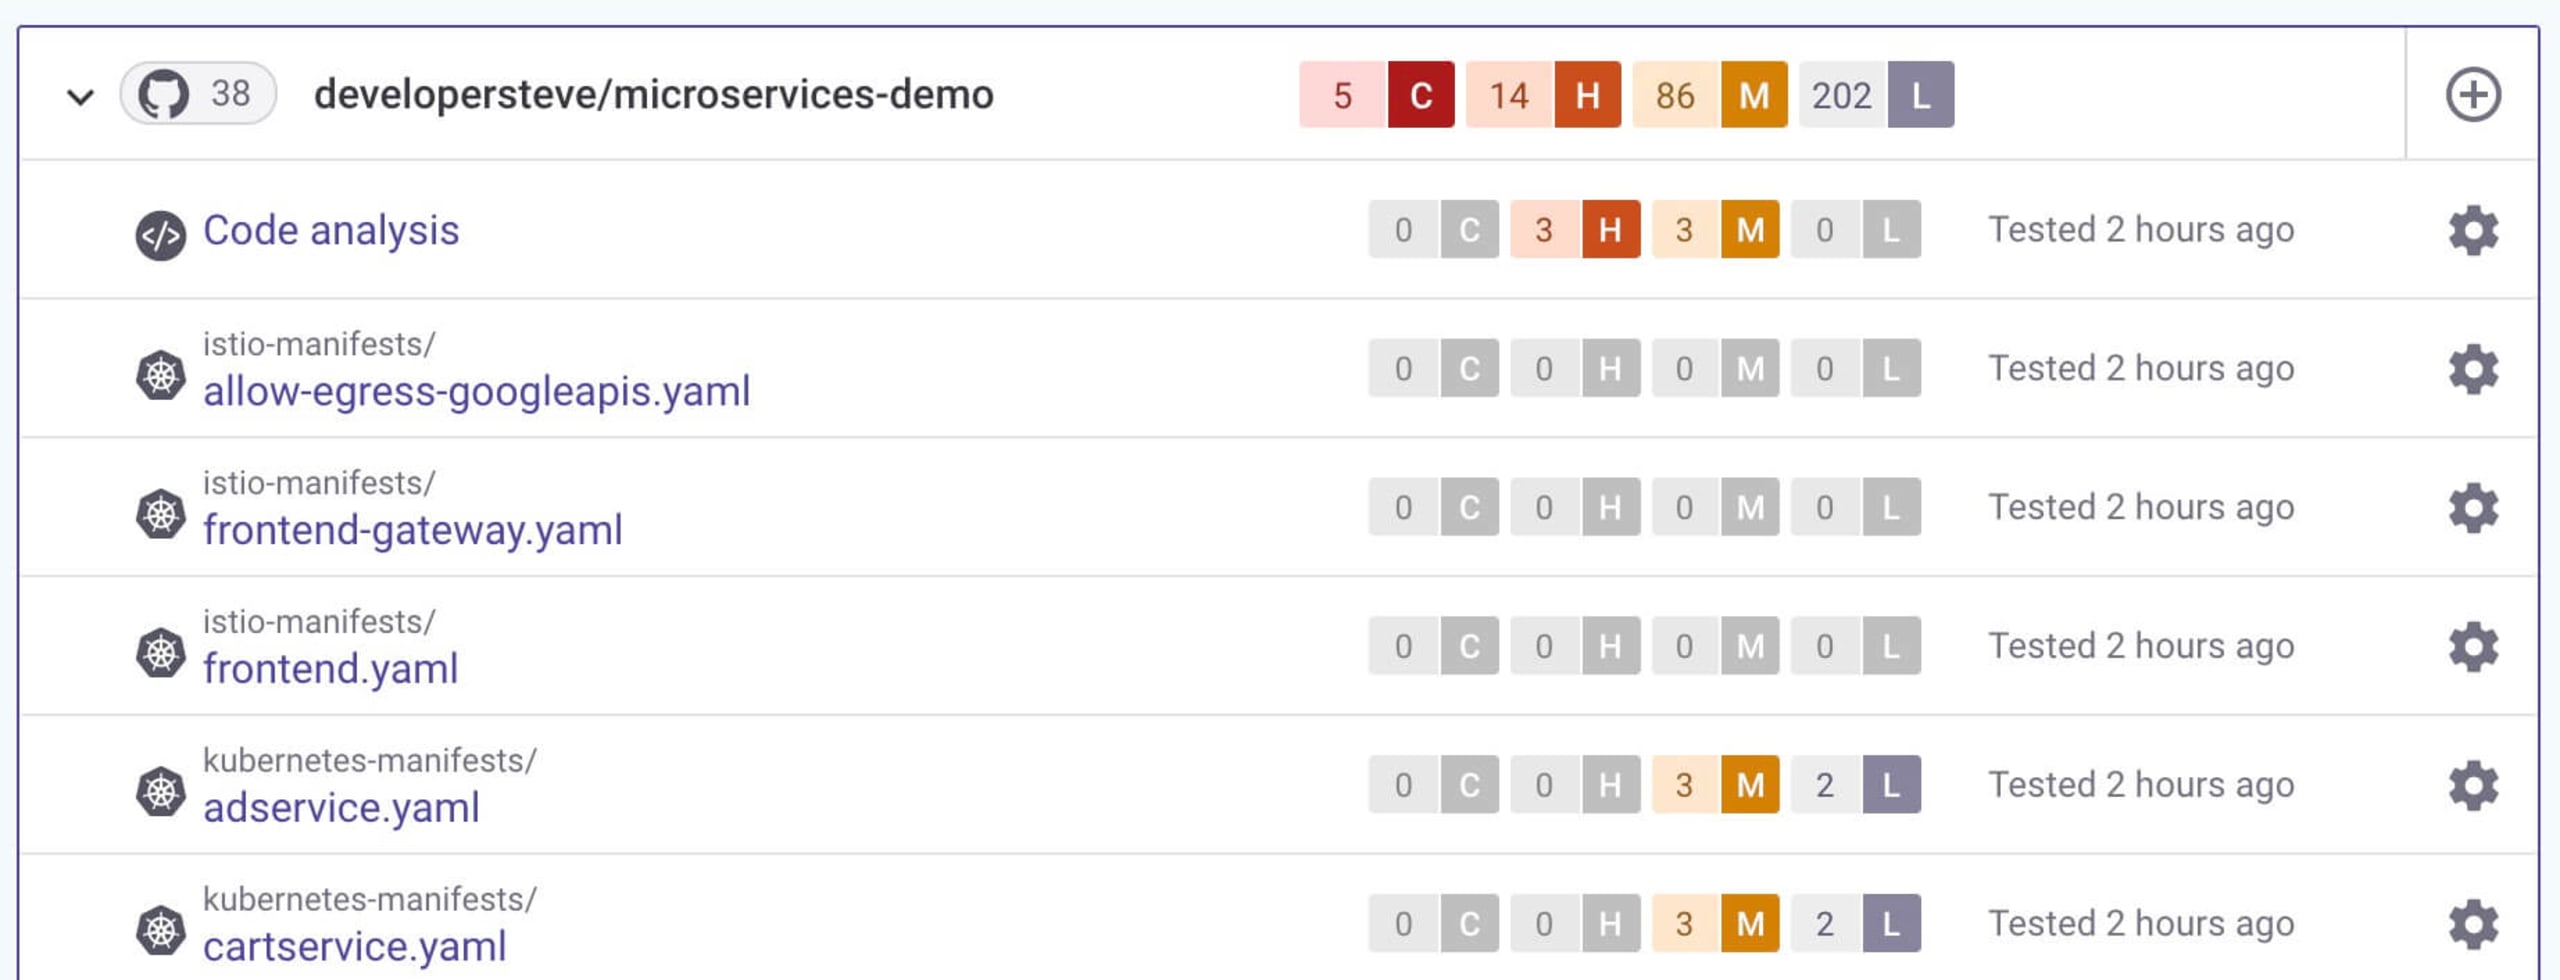
The best part for PCI review tracking is that all findings are stored in each line item's history section. This will show detected issues and remediation advice as each scan is performed, which is useful during PCI compliance auditing.

On top of all this, Snyk can also integrate with coding IDEs to help identify issues as you are building apps out. This is really handy because it can help identify issues — and provide remediation advice — as you are coding.
Building security into the CI/CD pipeline
Automation is great for everyone involved in any part of the SDLC. It not only makes life easier for ongoing regular deployments but also helps define the steps and processes required for a deployment to occur. A great automation pipeline will be able to pull from a Git branch and be able to stage and deploy with testing built in along the way.
The underlying backbone to any automated SDLC is the CI/CD pipeline which should be configured to connect to all aspects of your SDLC.
Setting up security as part of your CI/CD pipeline is a highly recommended practice, as security should be continuous too. To help with this, Snyk integrates with a number of different pipelines and all major cloud providers such as AWS, GCP, and Azure. For more on CI/CD integration best practices see our page on CI/CD best practices.
AWS CodePipeline security example
For this example, let's build some security scanning into AWS CodePipeline using the Snyk AWS integration.
Let's start with a basic AWS CodePipeline to build out a deployment using the microservices demo application, then integrate Snyk to do some security scanning.

Head to the AWS CodePipelines dashboard and click on Create Pipeline. Set the pipeline name and choose a service role in the Step 1 screen. On Step 2, we are going to choose the Git repository in which the code we want to deploy resides. If this is the first time connecting to the Git service, it will step through the connection process and request the required permissions.
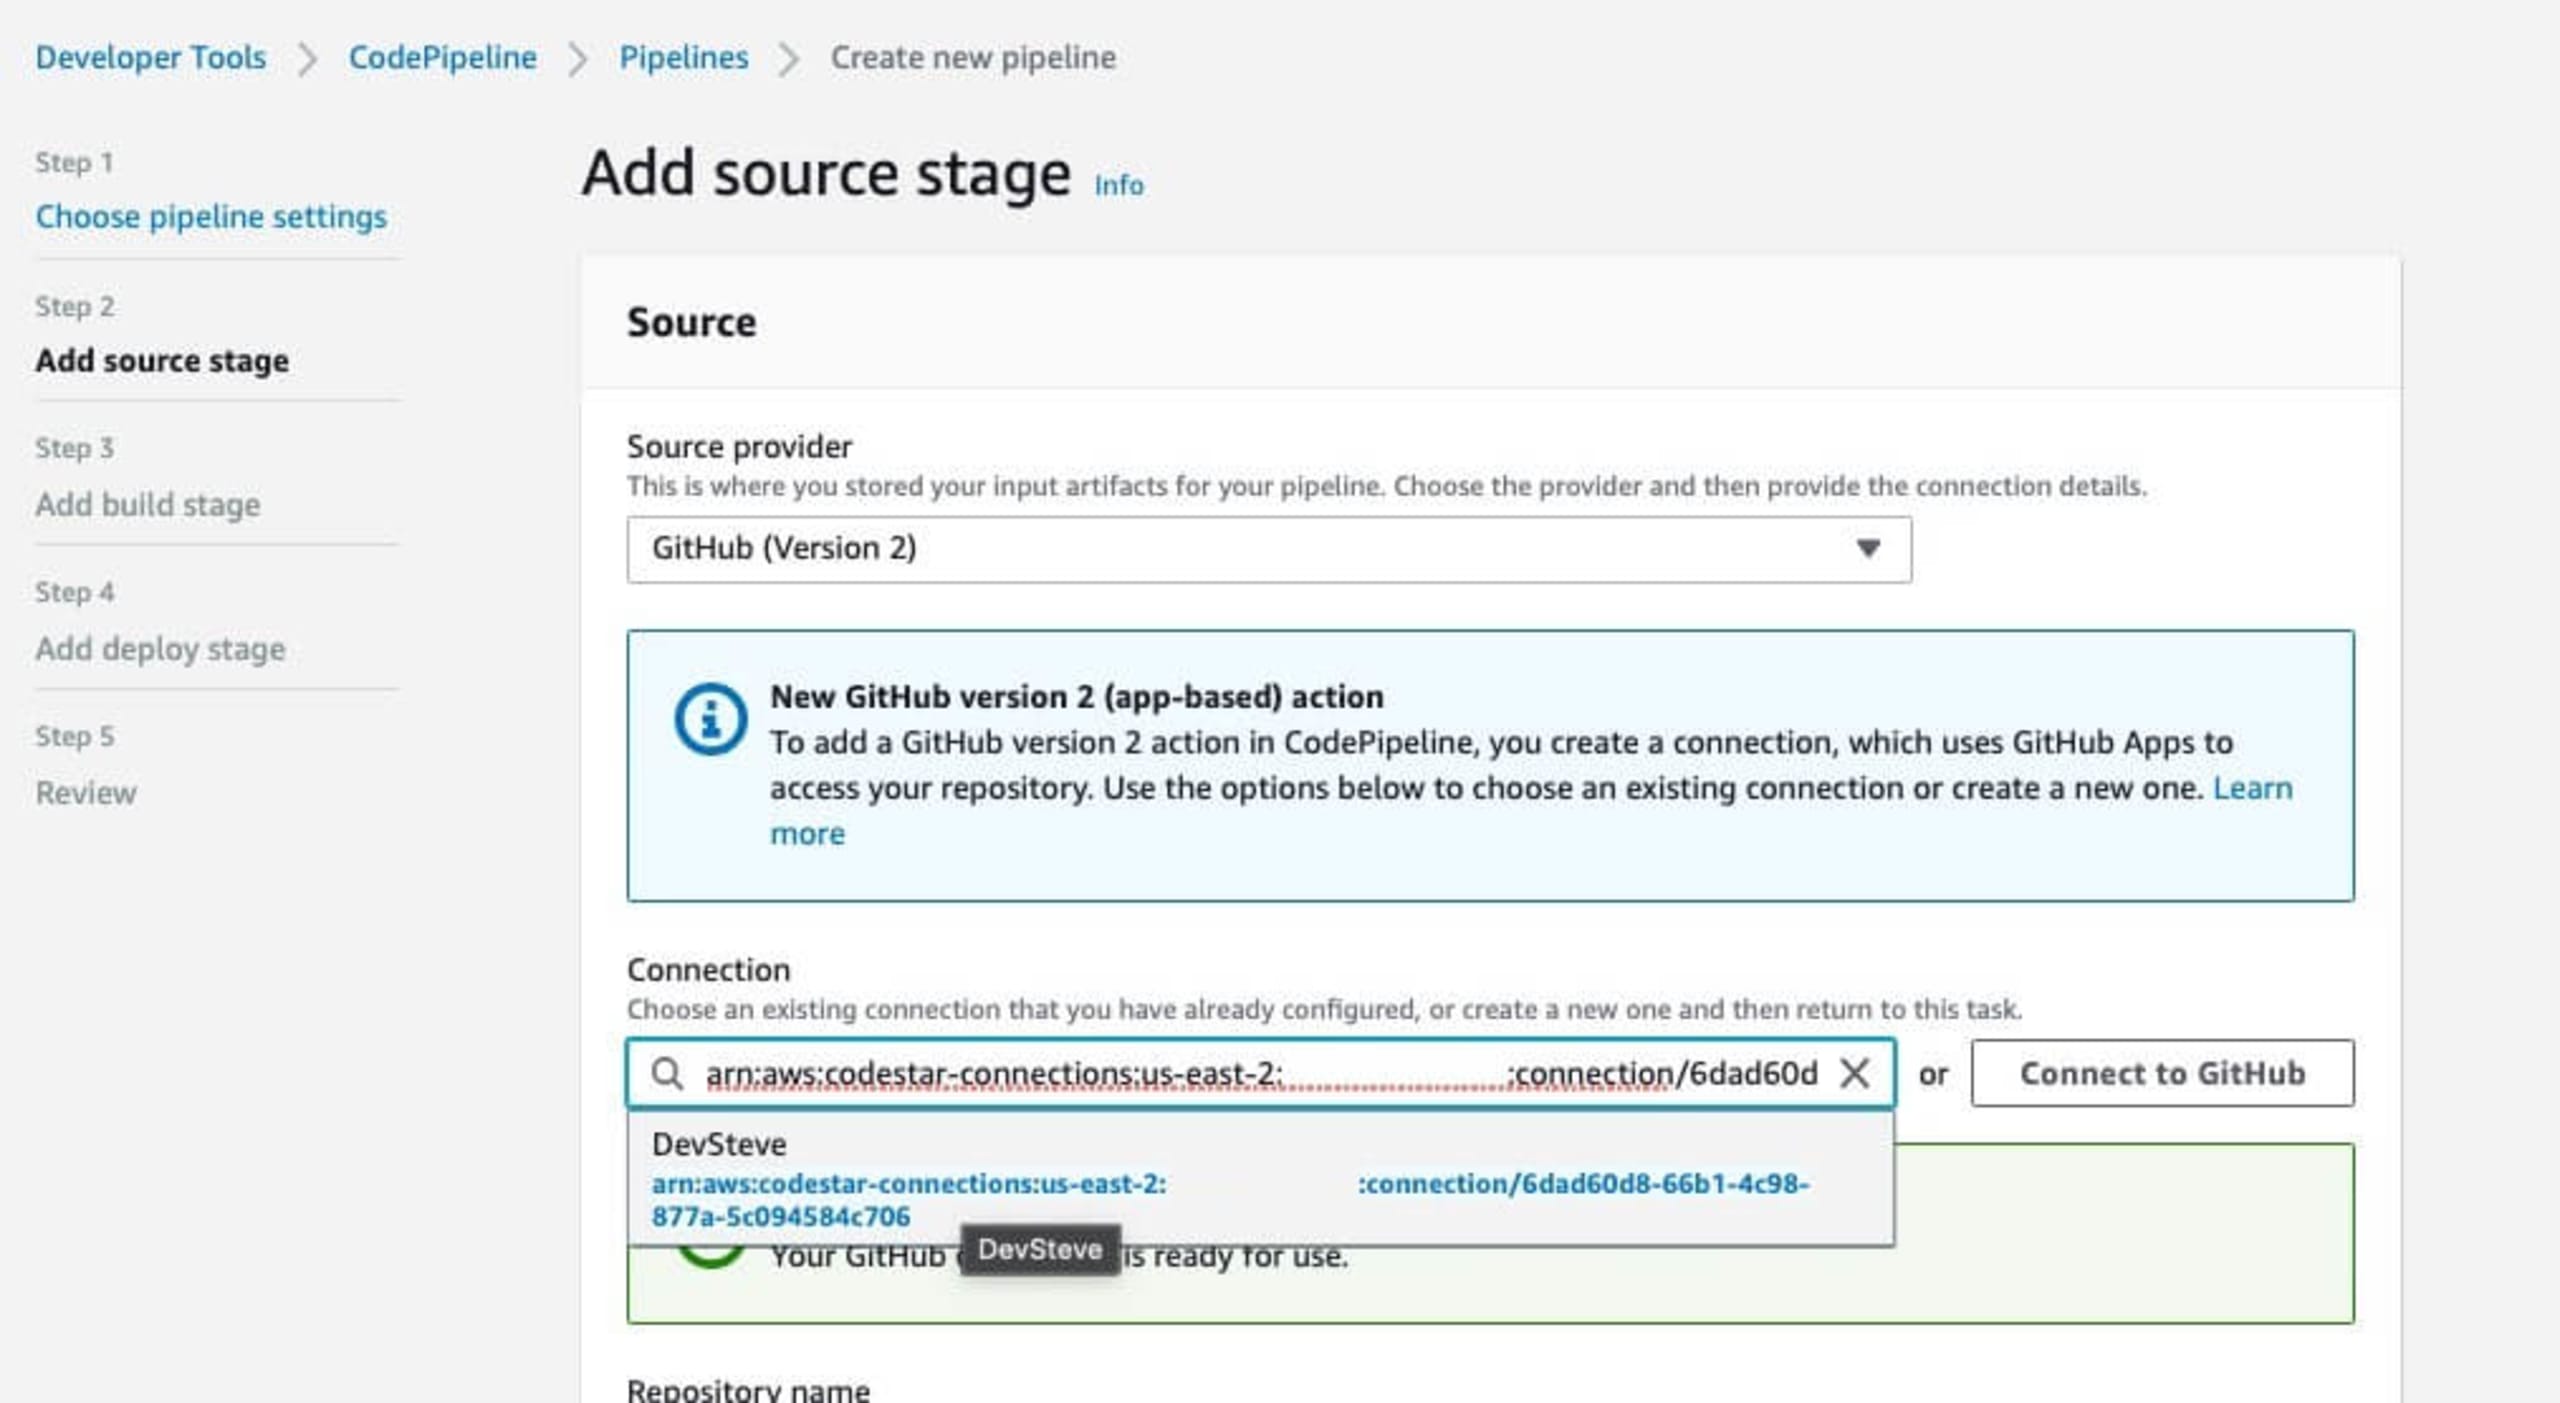
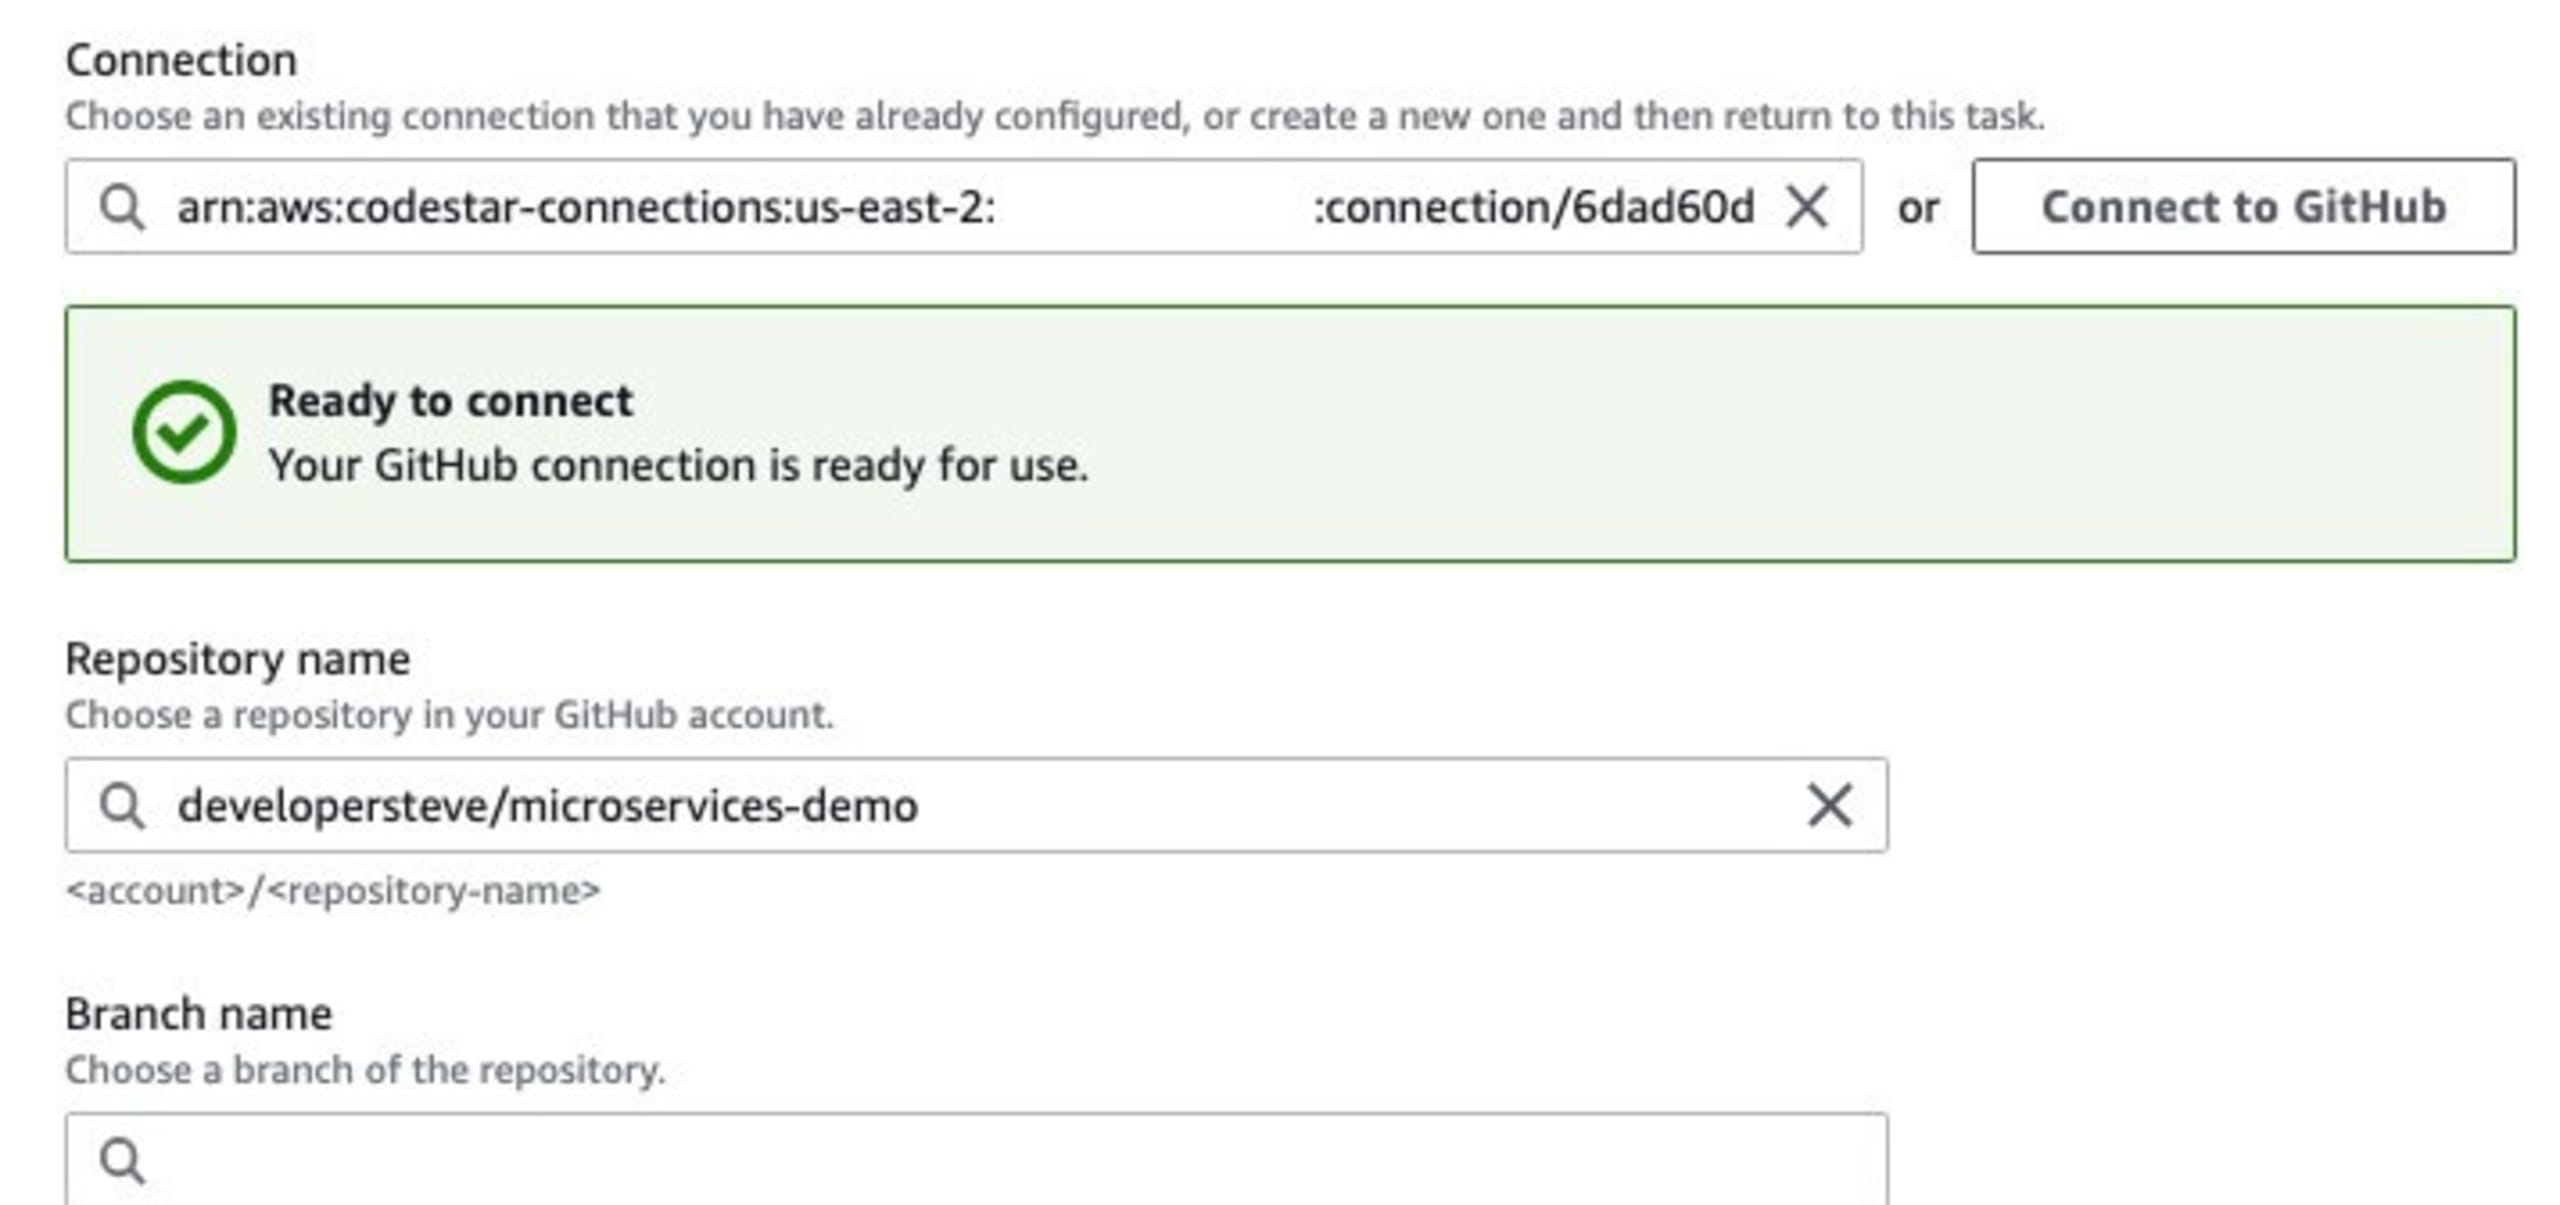
Once the code source location is connected, next we can choose the repository and the branch to use for the deployment flow.
Handy hint: If you are connecting to GitHub here, use the GitHub version 2 connection method. GitHub version 1 will soon be deprecated.
Click the Next button to move to Step 3 which will define the build parameters. For the build provider, I normally use AWS CodeBuild, but you can also add a Jenkins connection in here as well. Set the project name and any environment variables that your application may require.
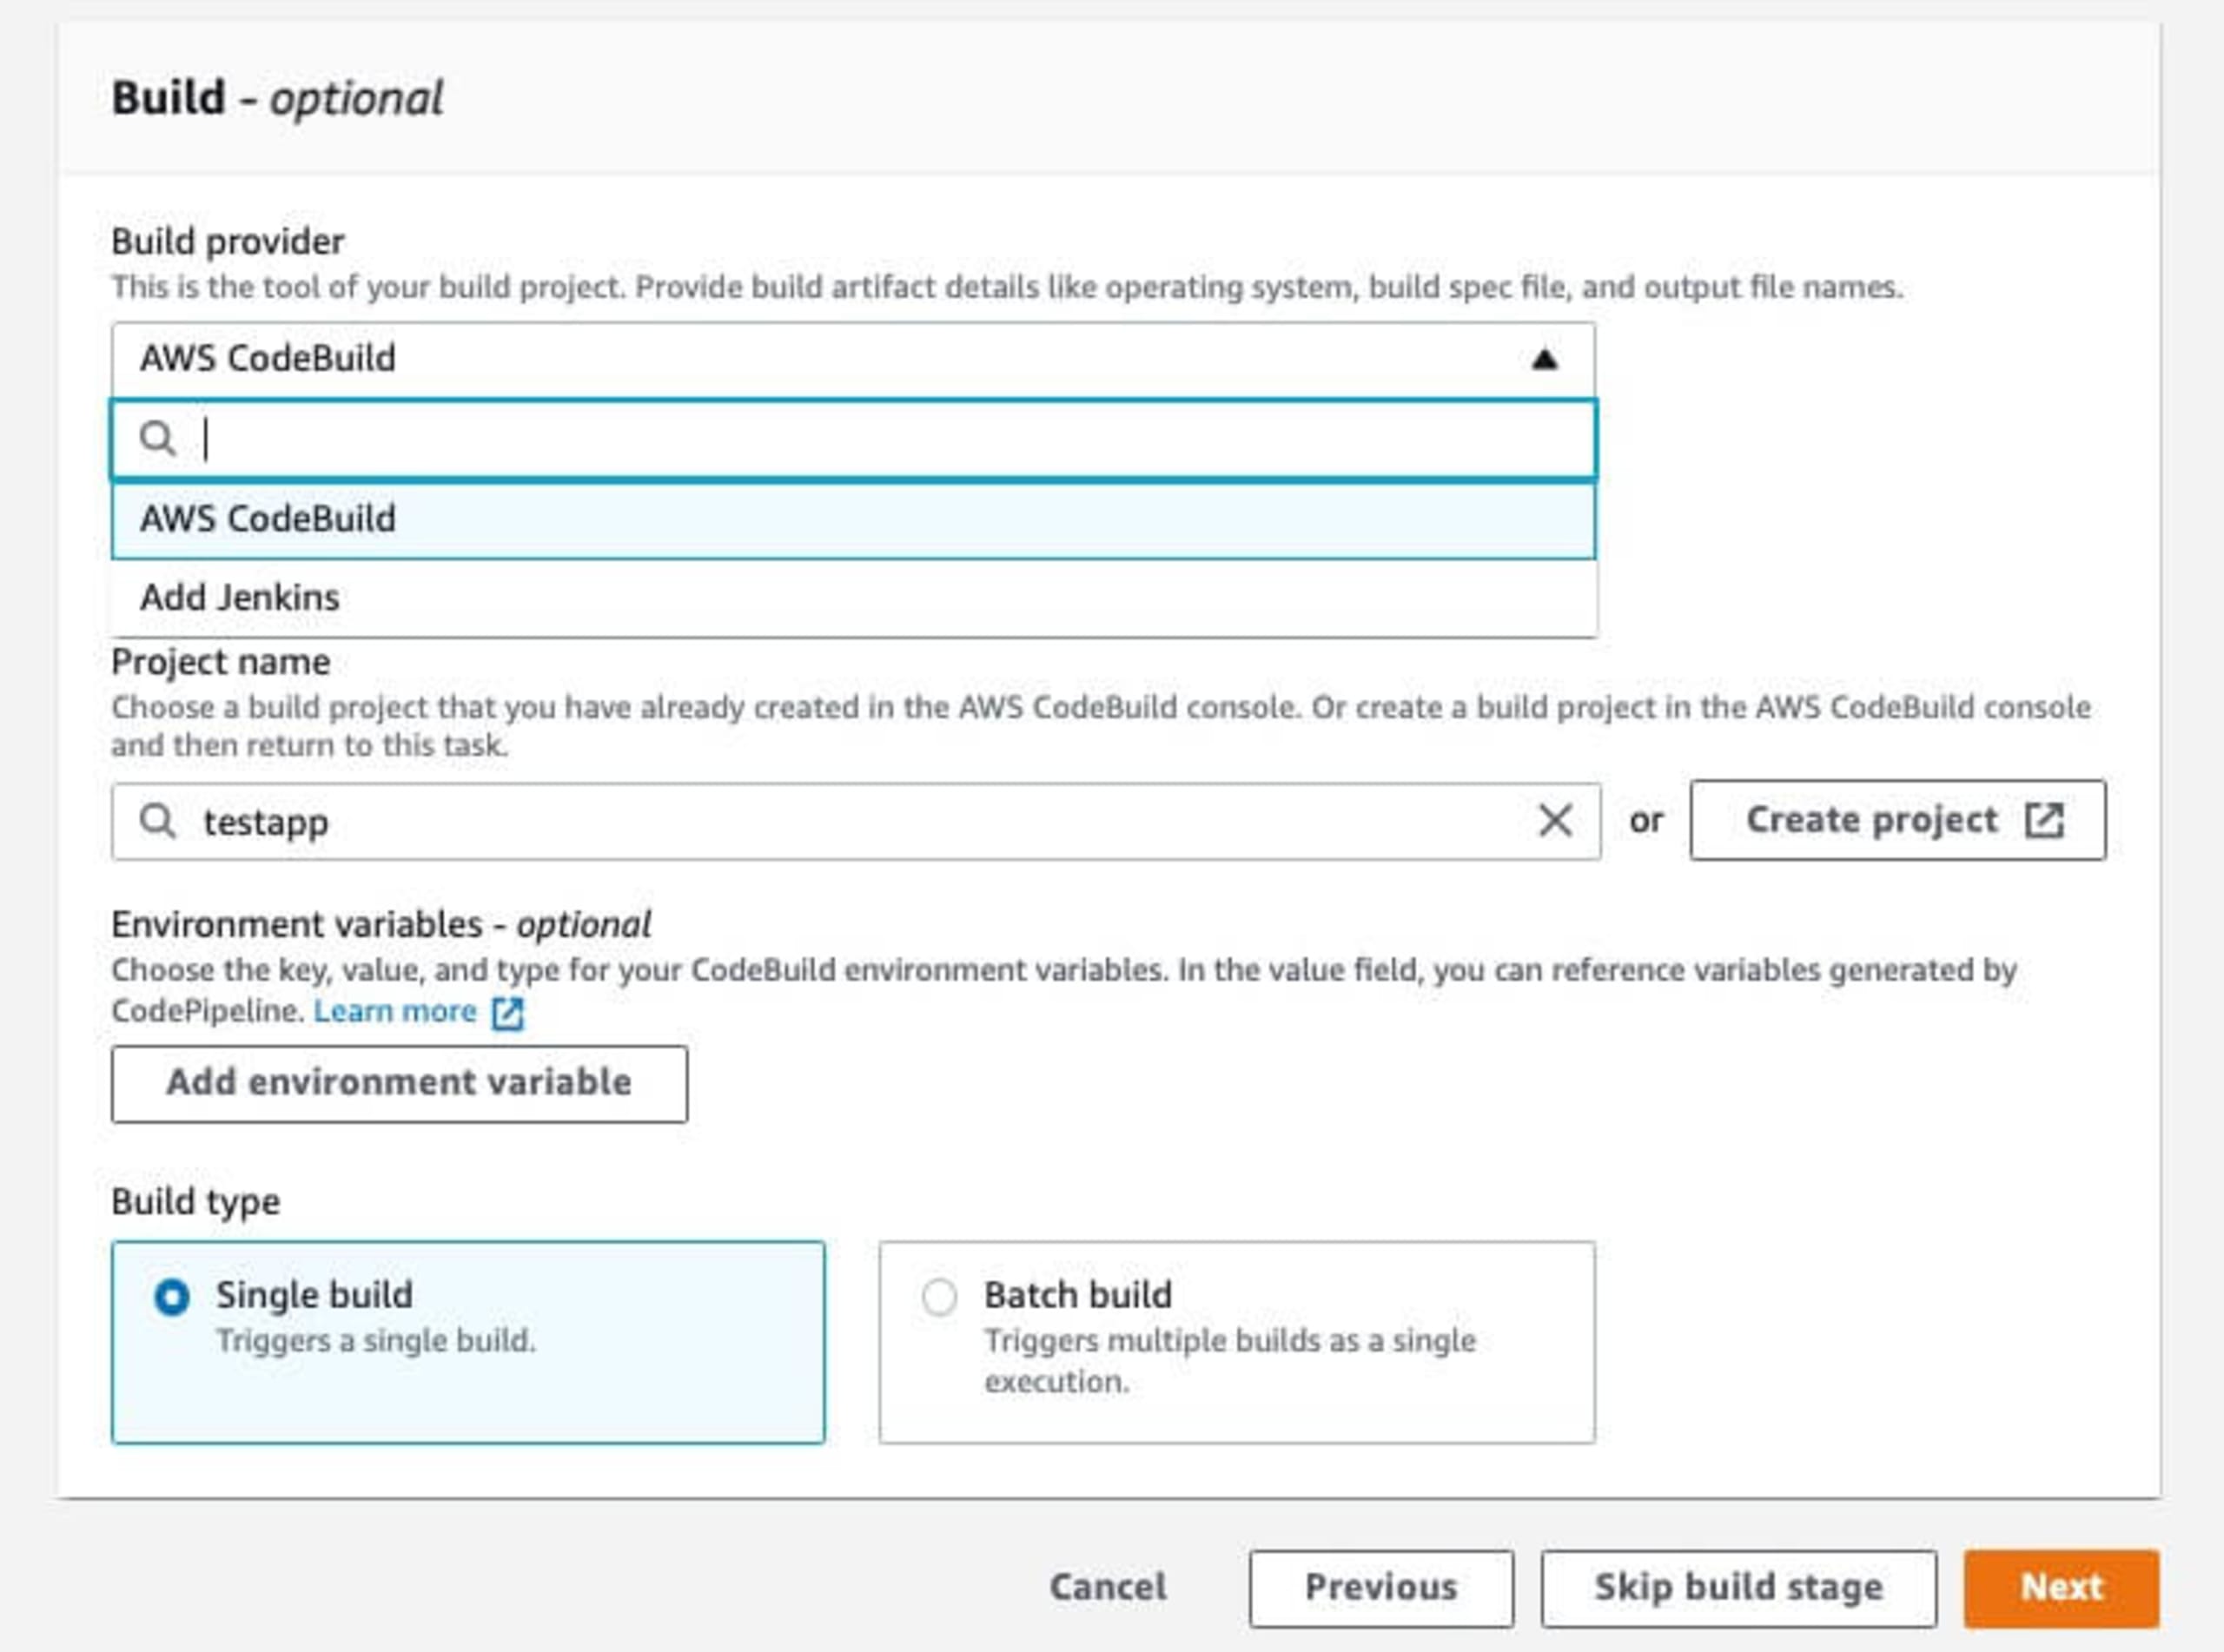
For basic demo application deployments, you can use Single build on the Build Type. For more complex deployments, the Batch build is handy for distributing across bigger infrastructure requirements.
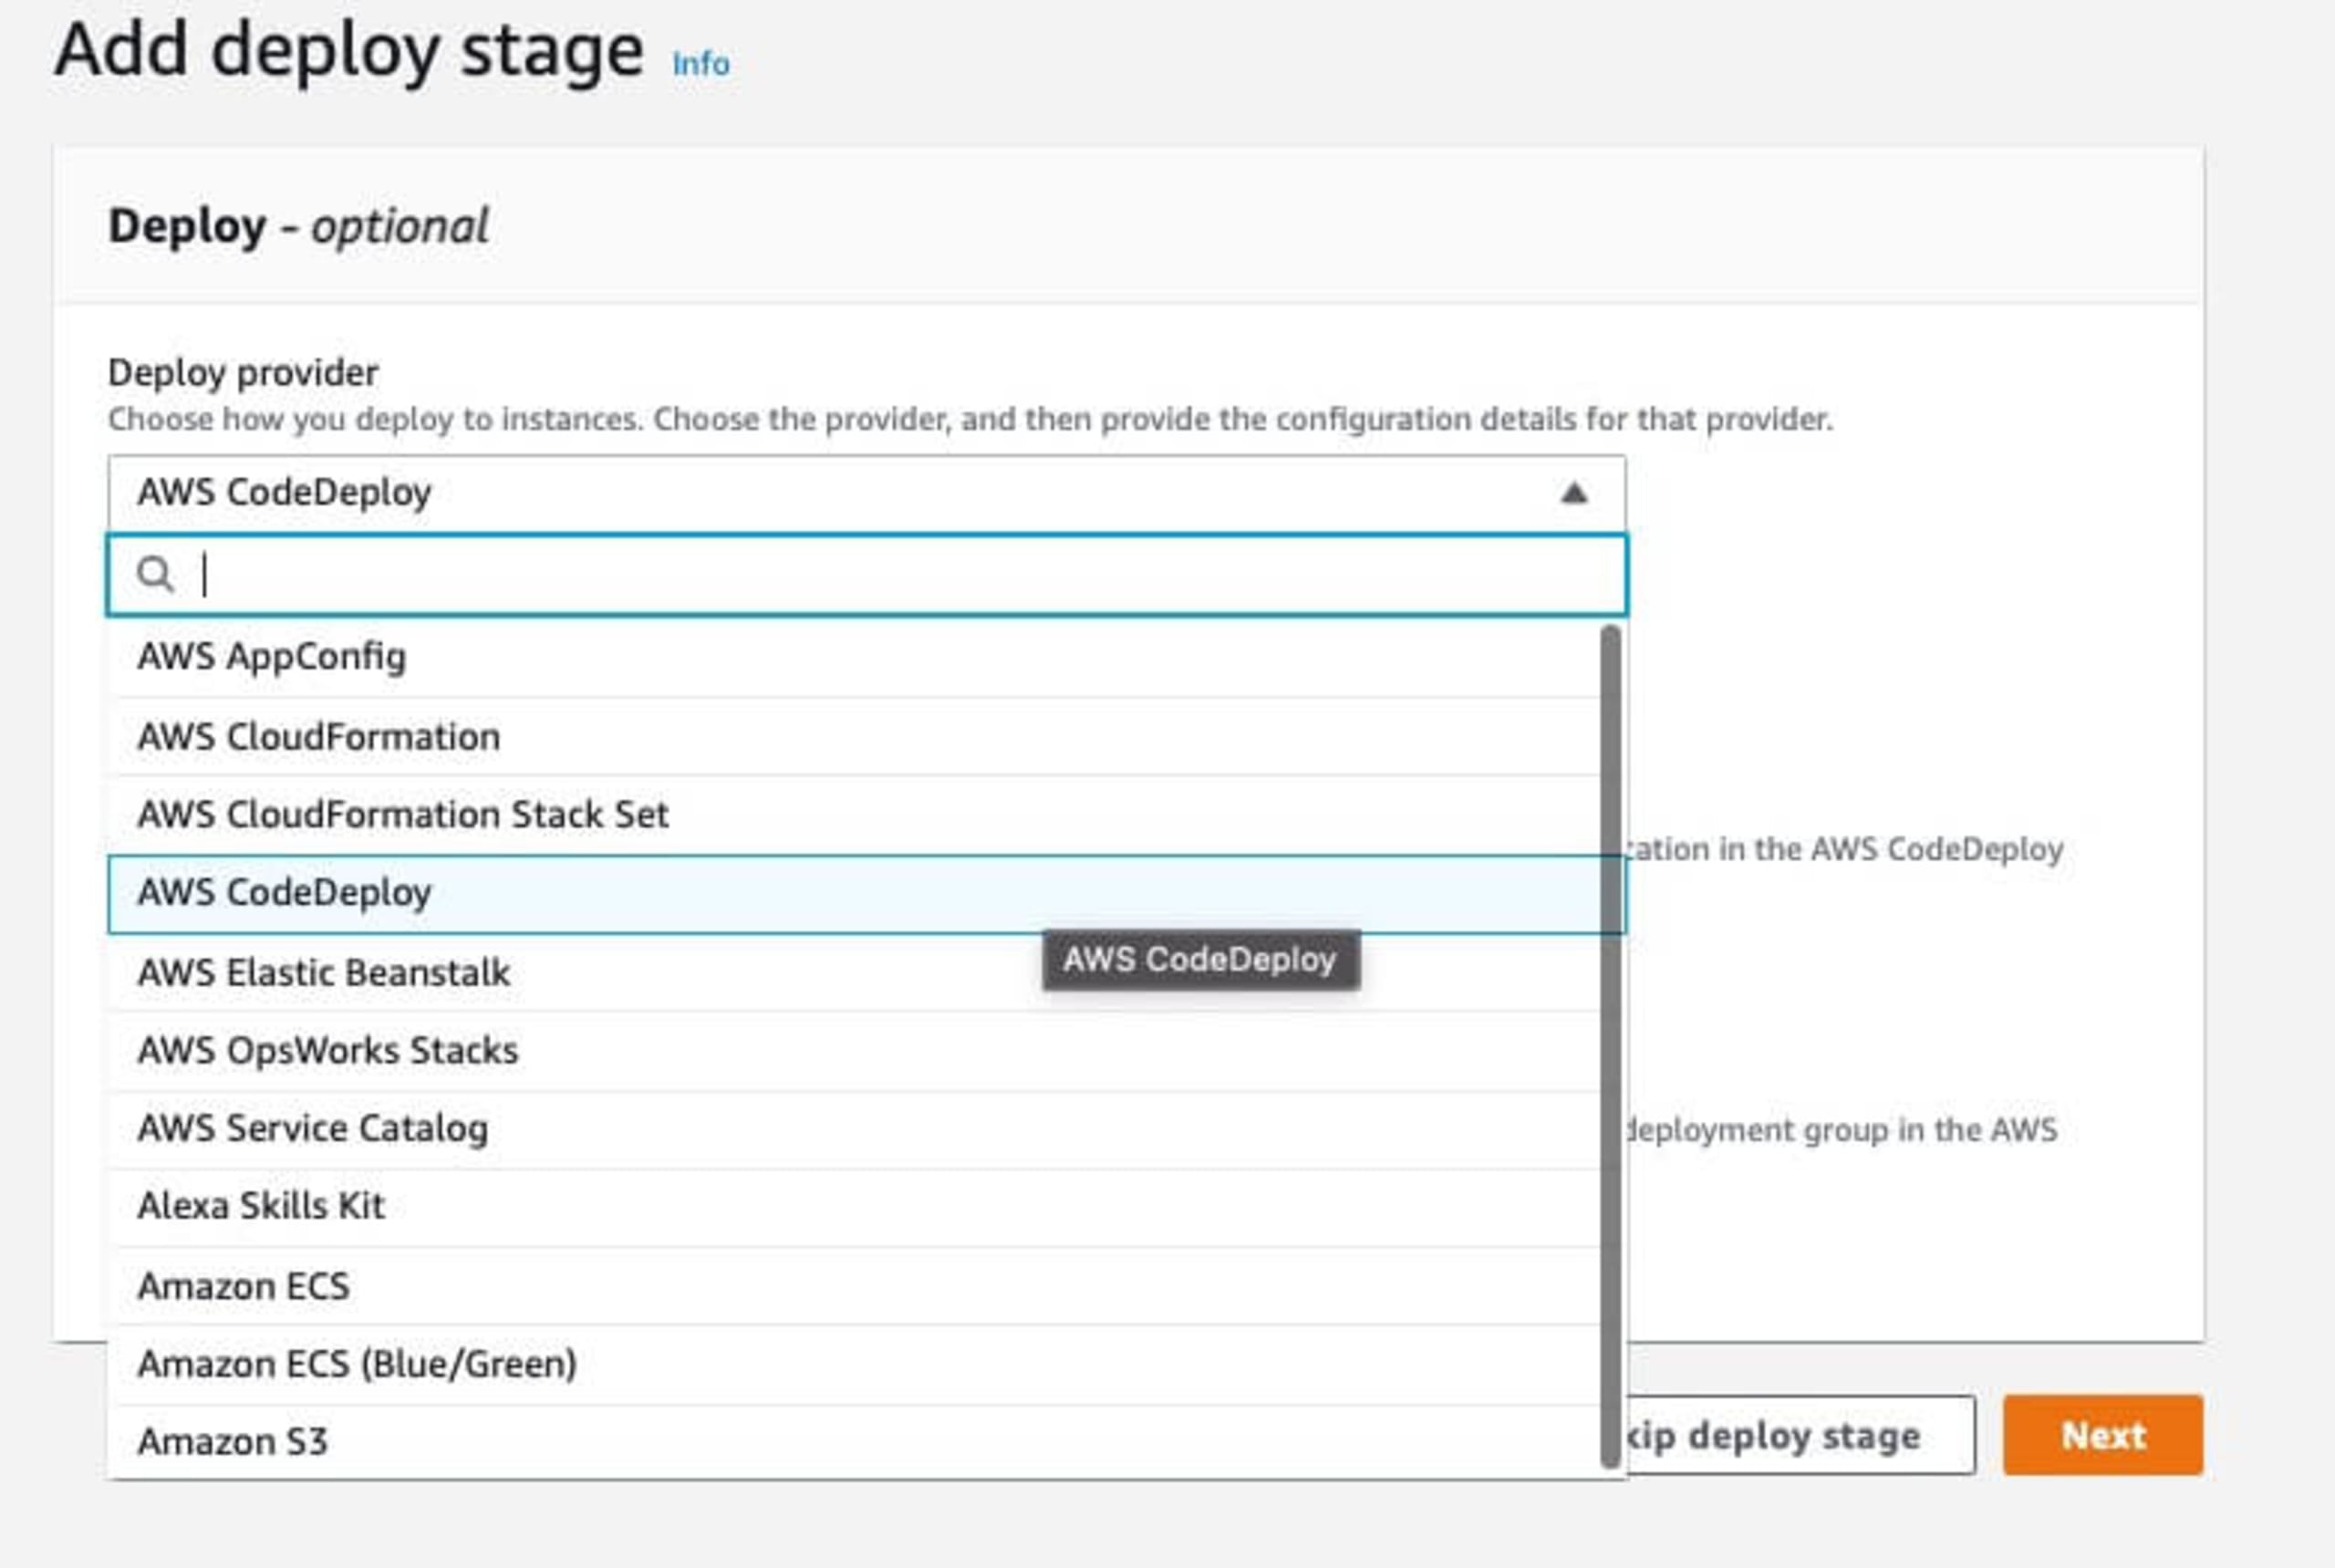
Next, in Step 4, we define the deployment configuration. For this demo, we can use the AWS CodeDeploy option which will use predefined infrastructure. The next few fields on this step will then let you choose which infrastructure to choose and will change depending on what you've selected.
The final step in Step 5 will let you review the AWS CodePipeline configuration before saving. The pipeline will then go through the deployment process, starting with retrieving the code to be deployed.
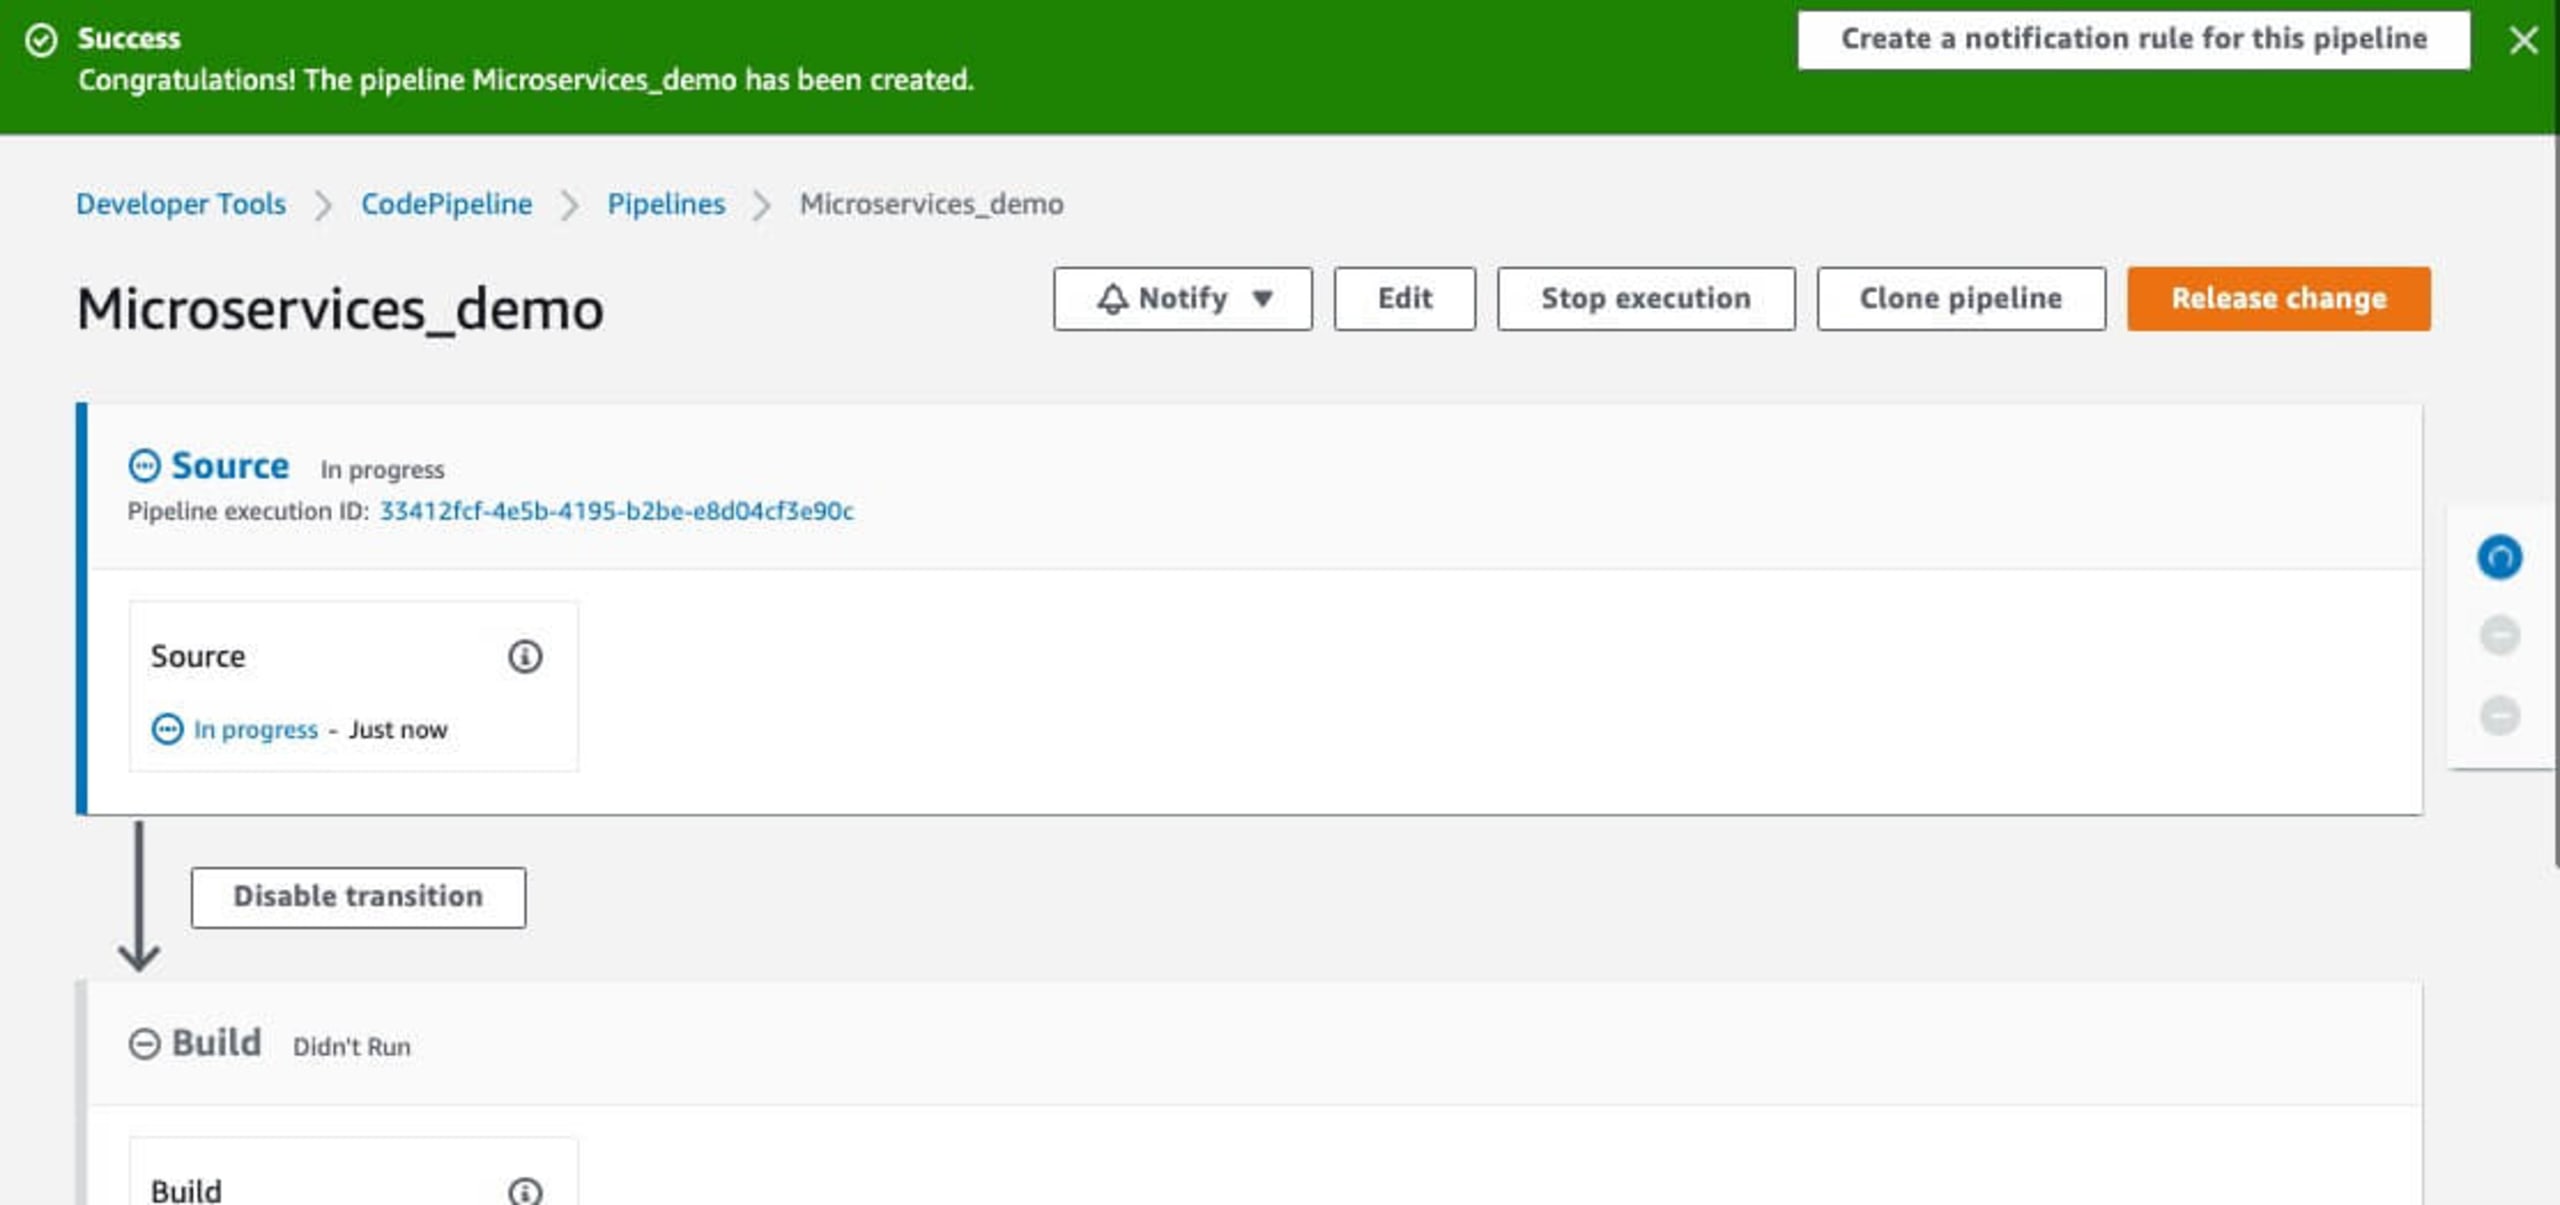
Adding Snyk security to the pipeline
Now, let's add a Snyk security scan into this flow using the Snyk AWS CodePipeline integration. Click on the CodePipeline name in the Dashboard and you will see each step as part of the flow deployment.
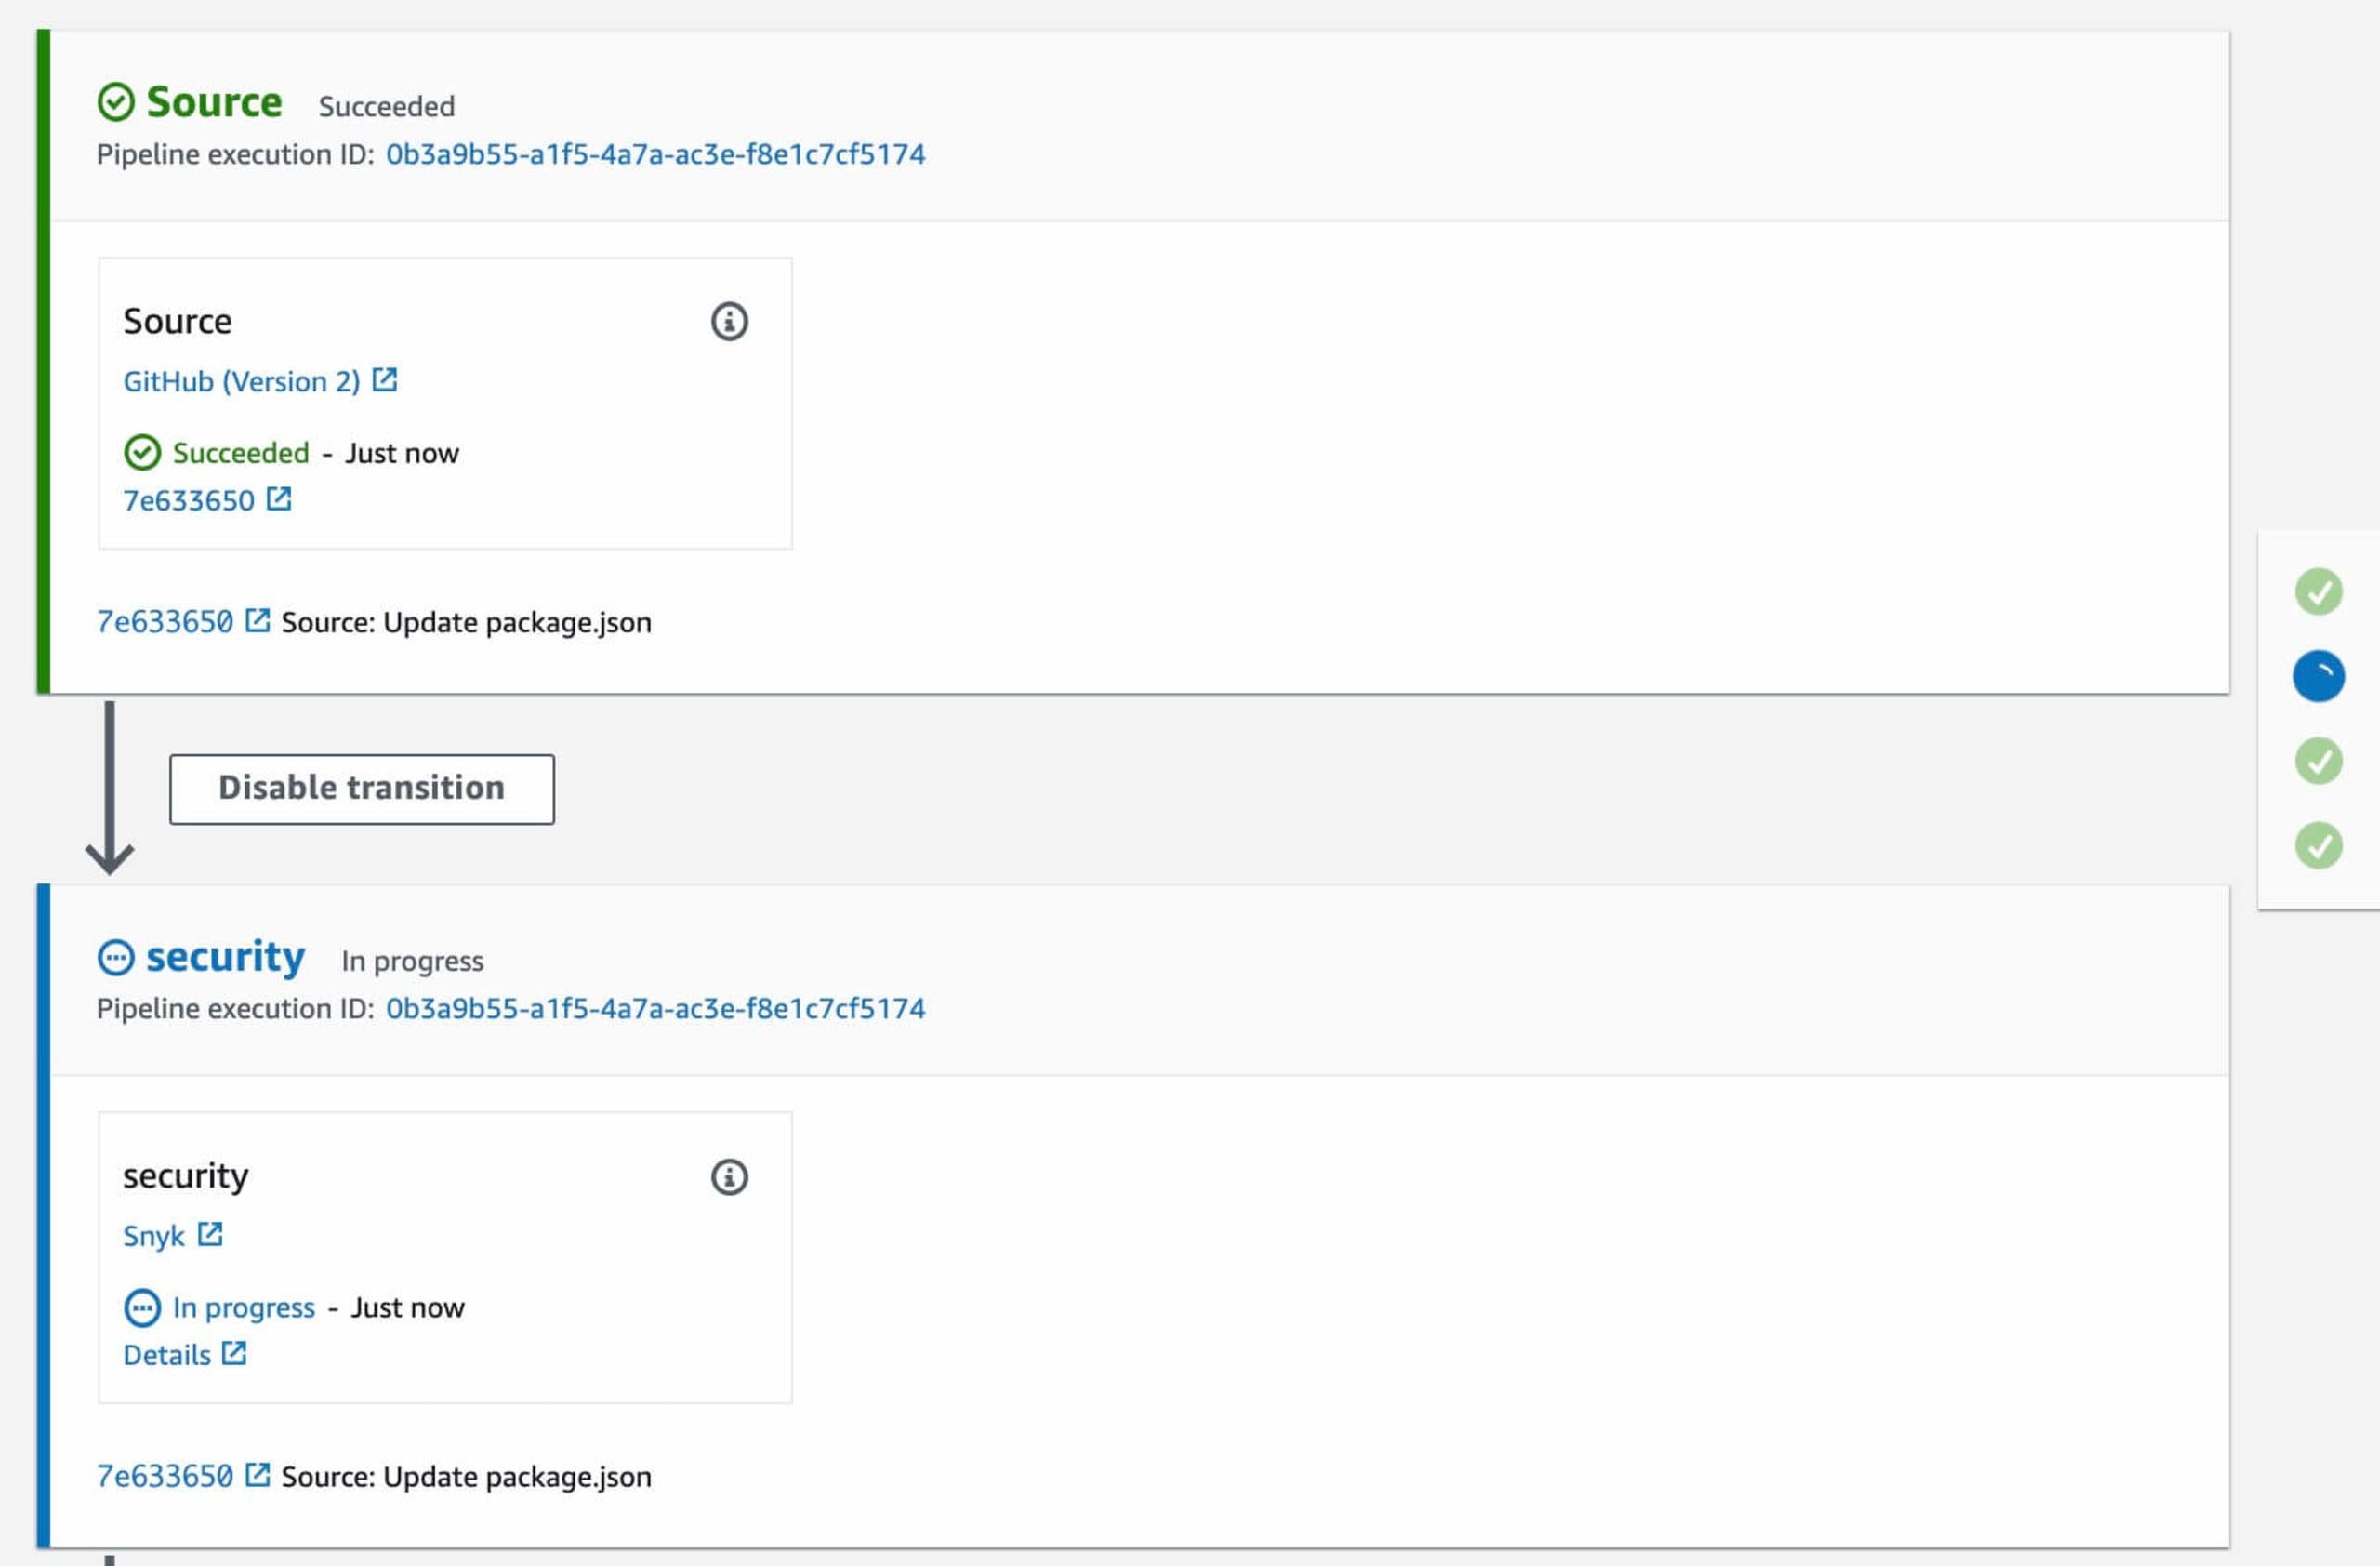
Now we are going to add a security step to this CodePipeline flow. Click the Edit button in the top right
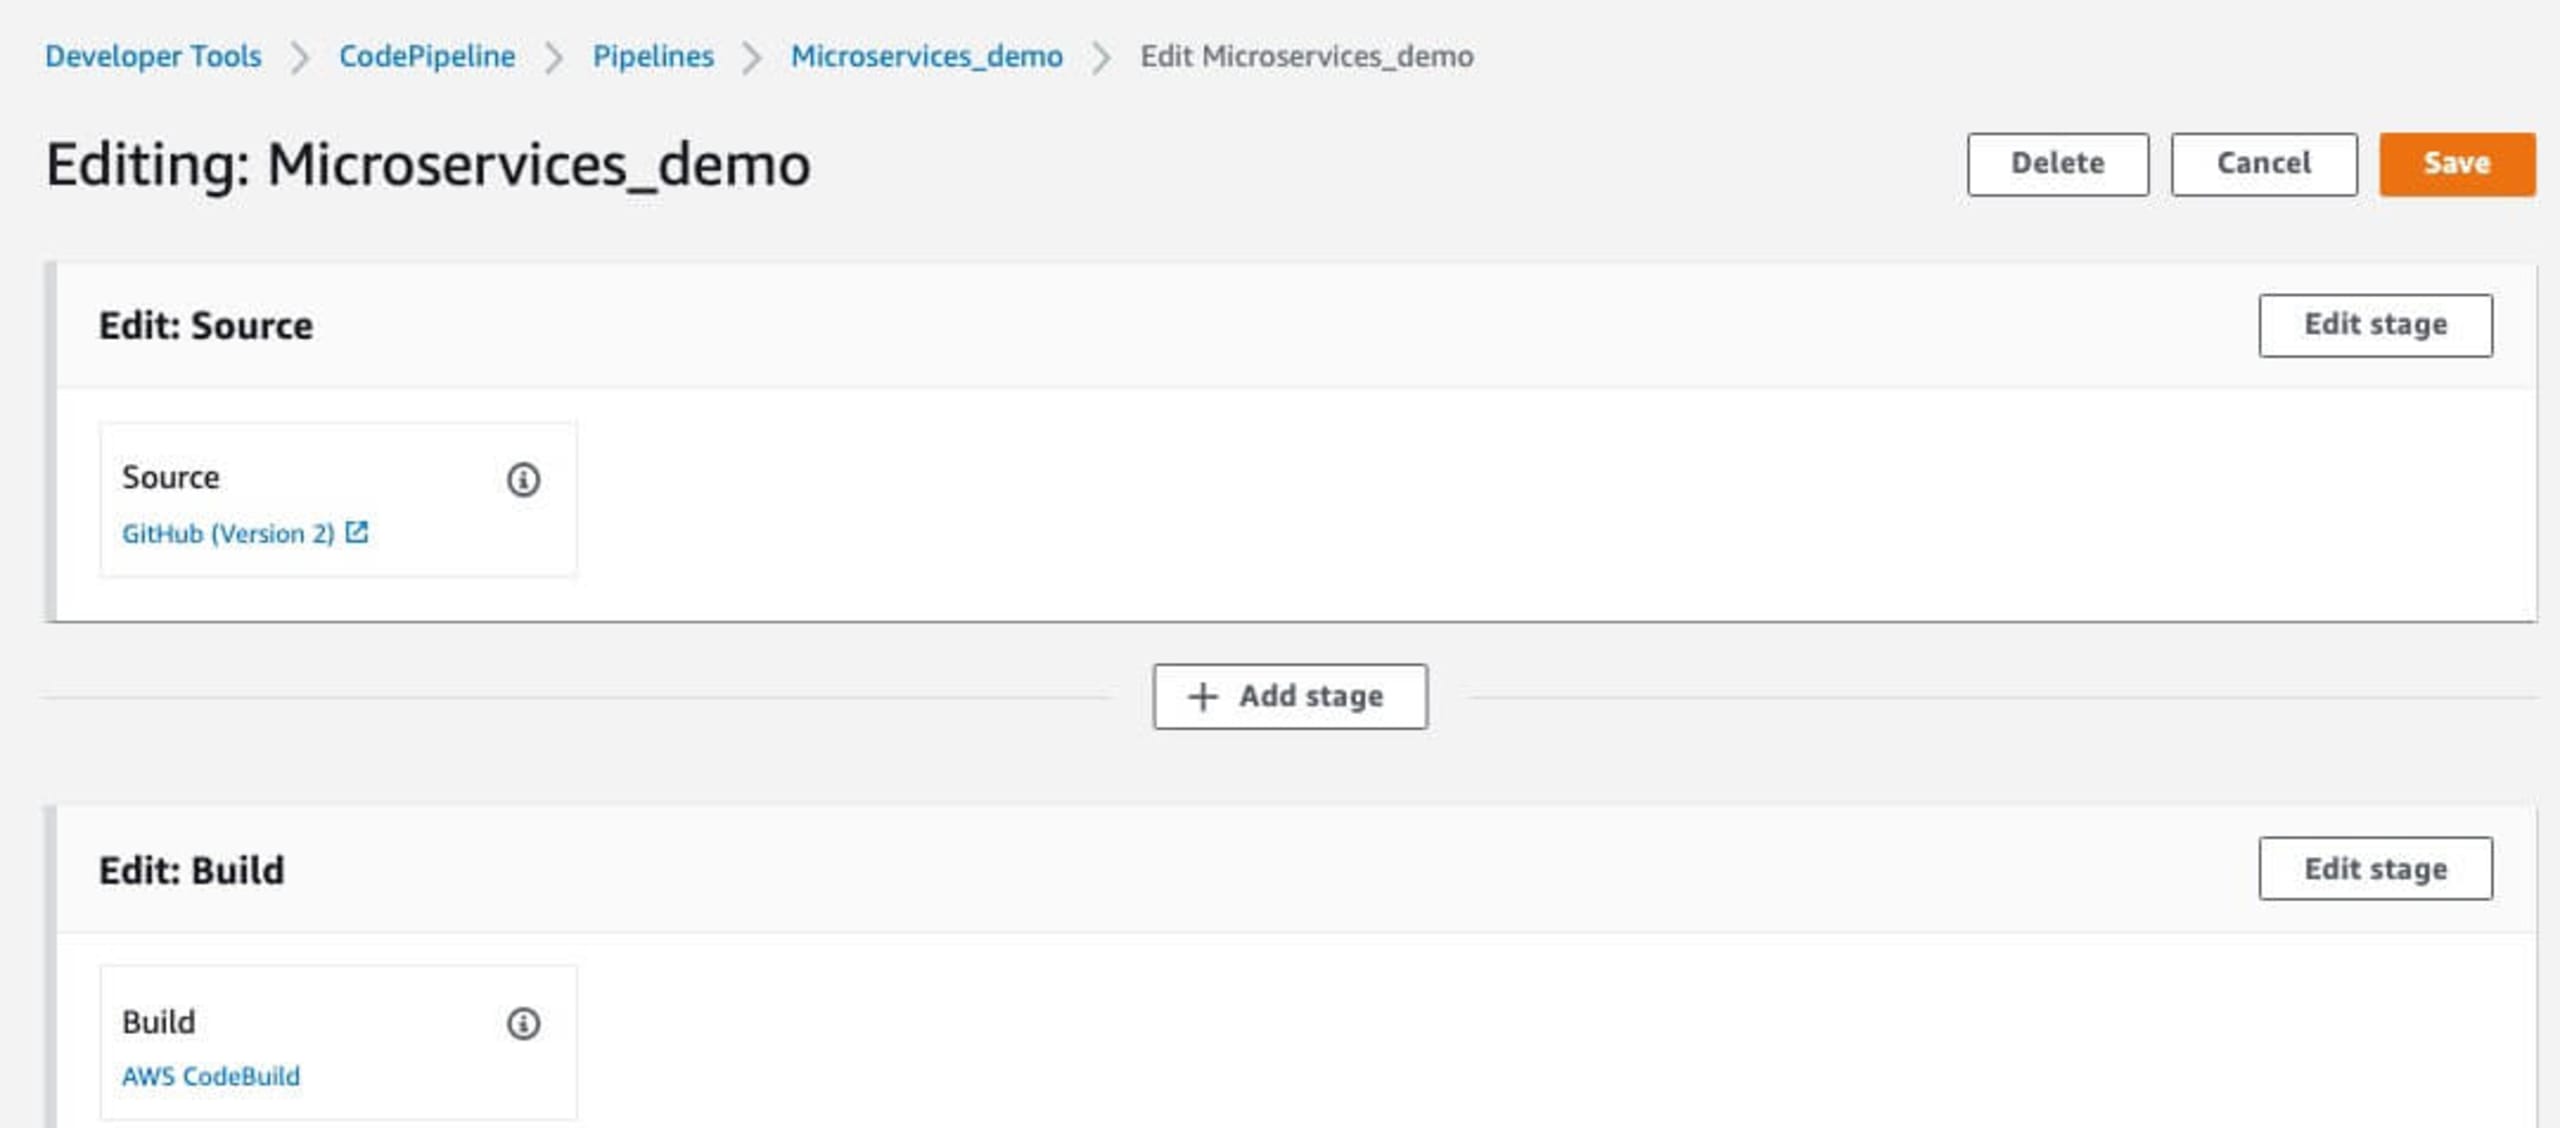
Then enter a name for the stage to be added. In this example, I'm using security as the name to appear on the final CodePipeline flow.

Click Add Stage which will then bring up the stage configuration page. Set the Action name, and then search for Snyk in the Action provider drop down in the Invokesection of the drop down list.
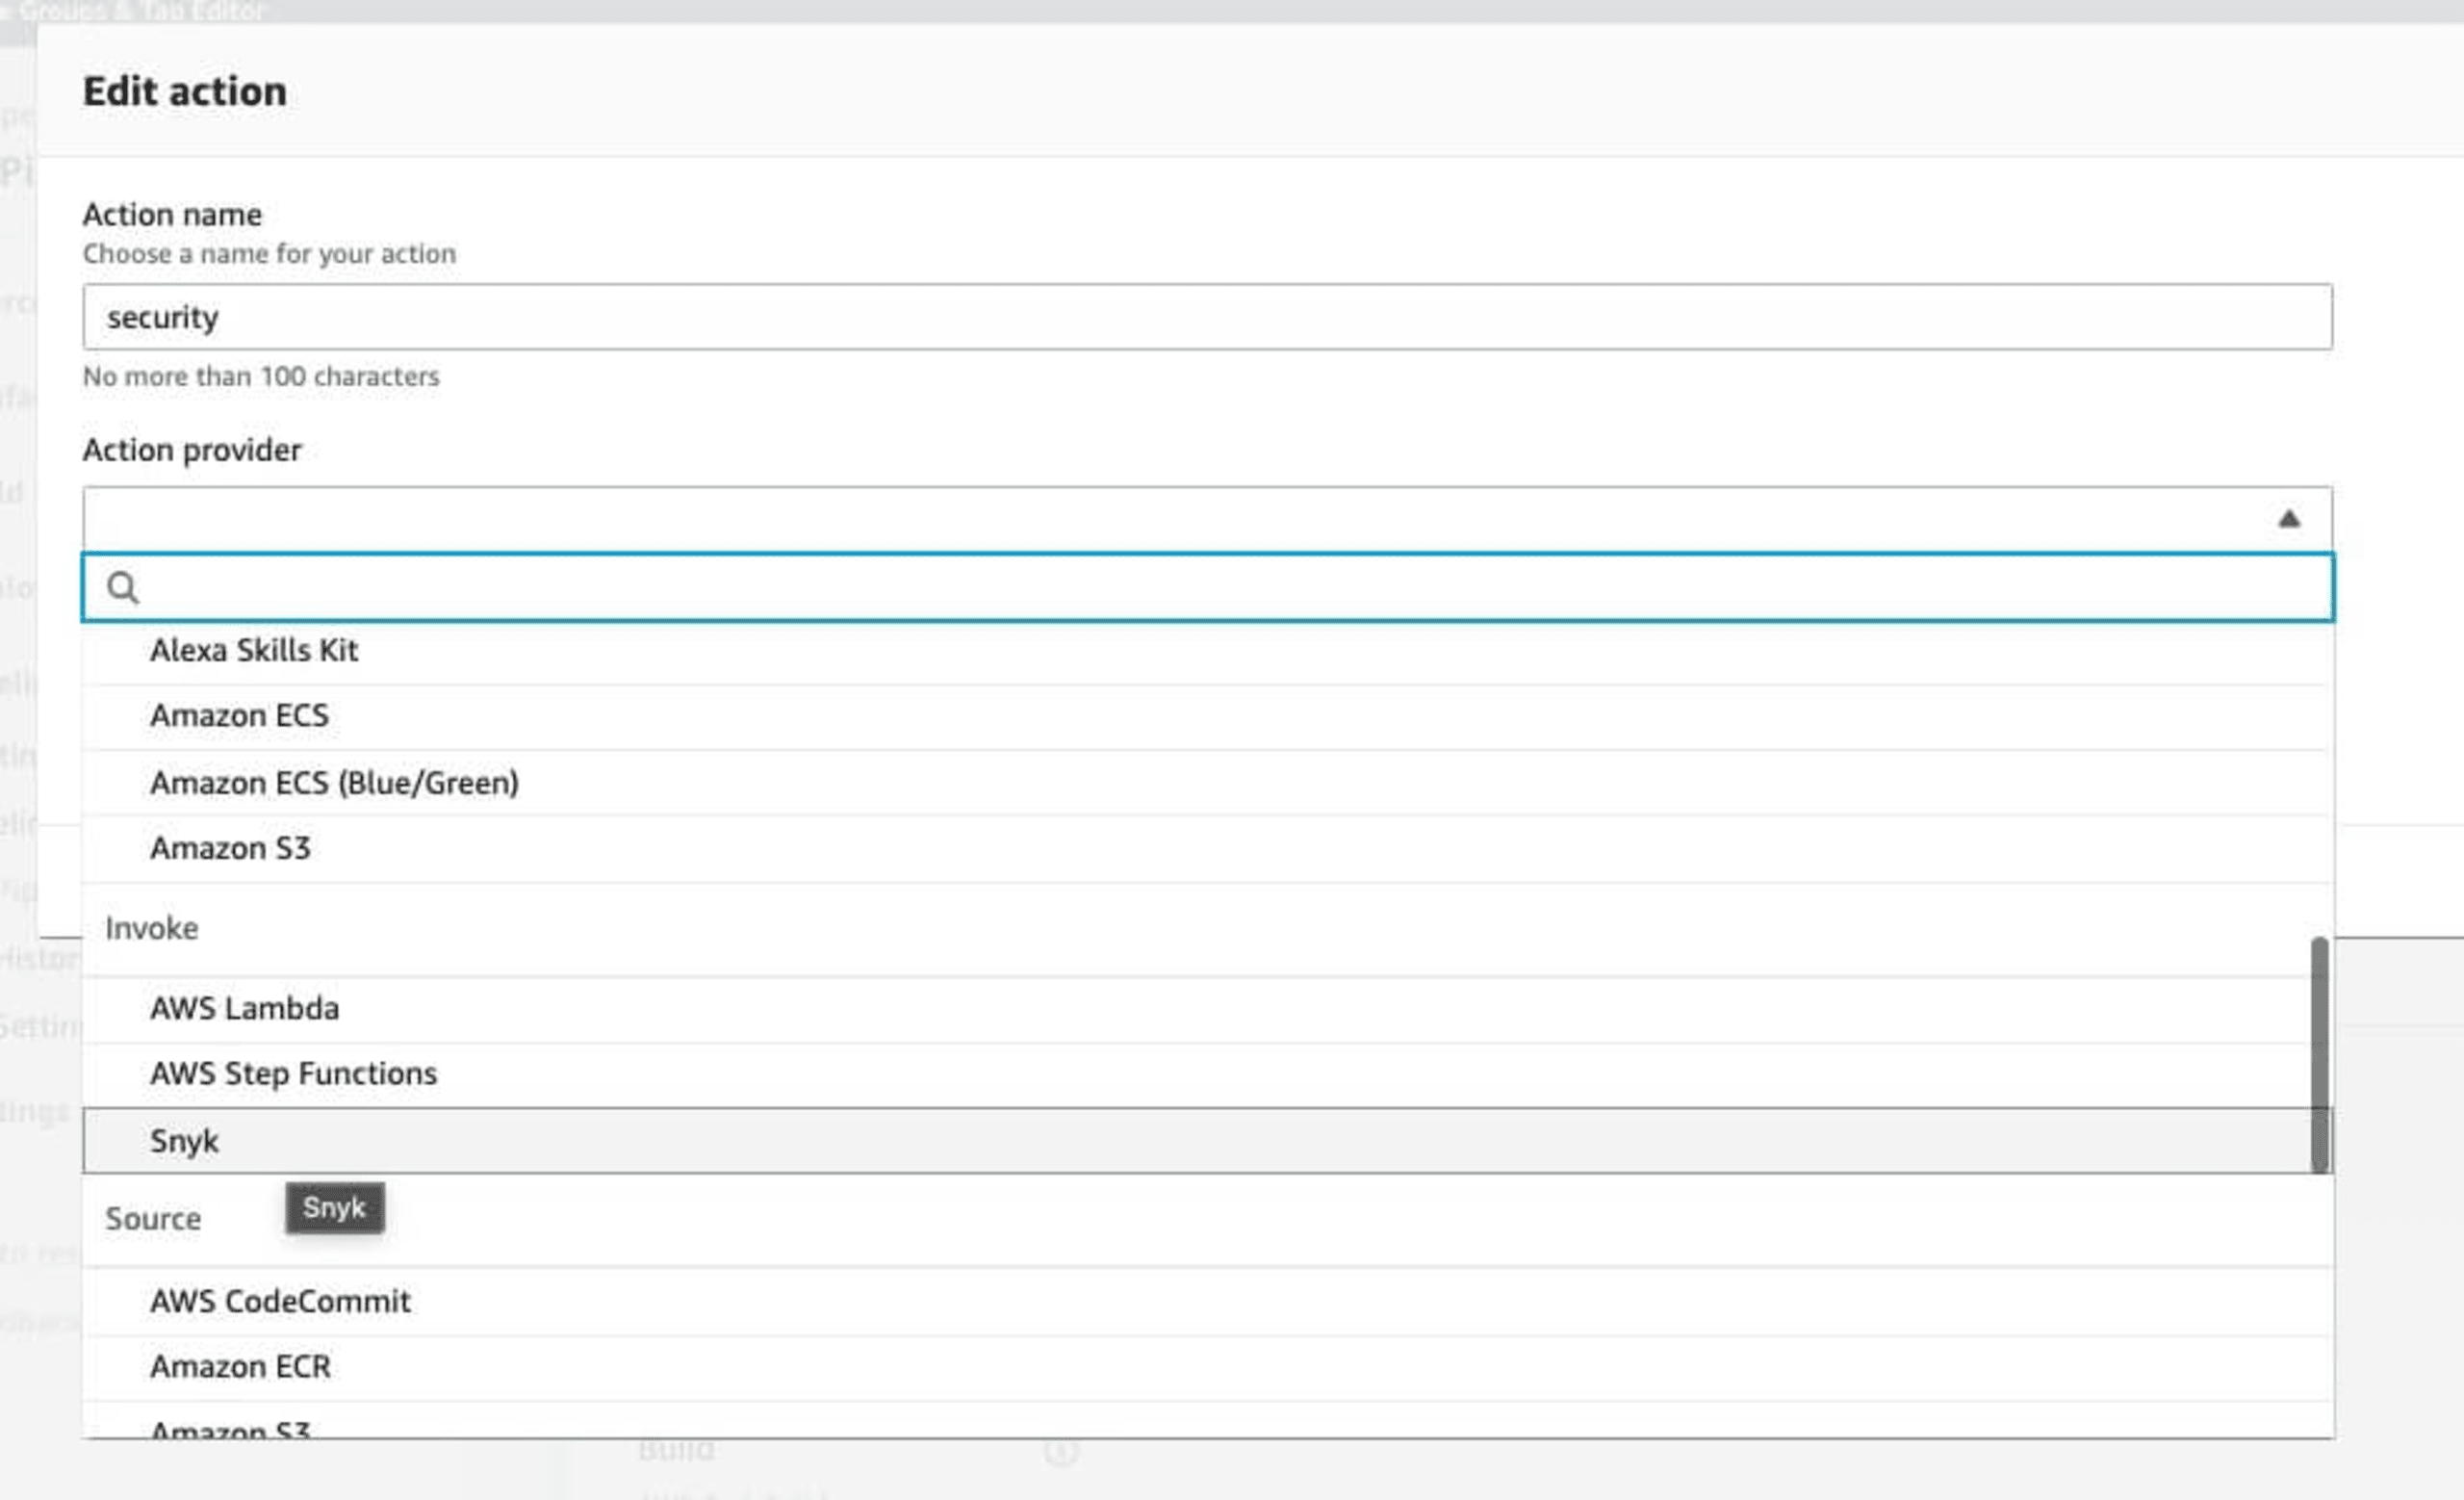
In the Input artifacts section, you can build from SourceArtifact, which will scan directly before the application is built.
Click the Connect to Snyk button which will bring up the Snyk for AWS CodePipeline integration box.
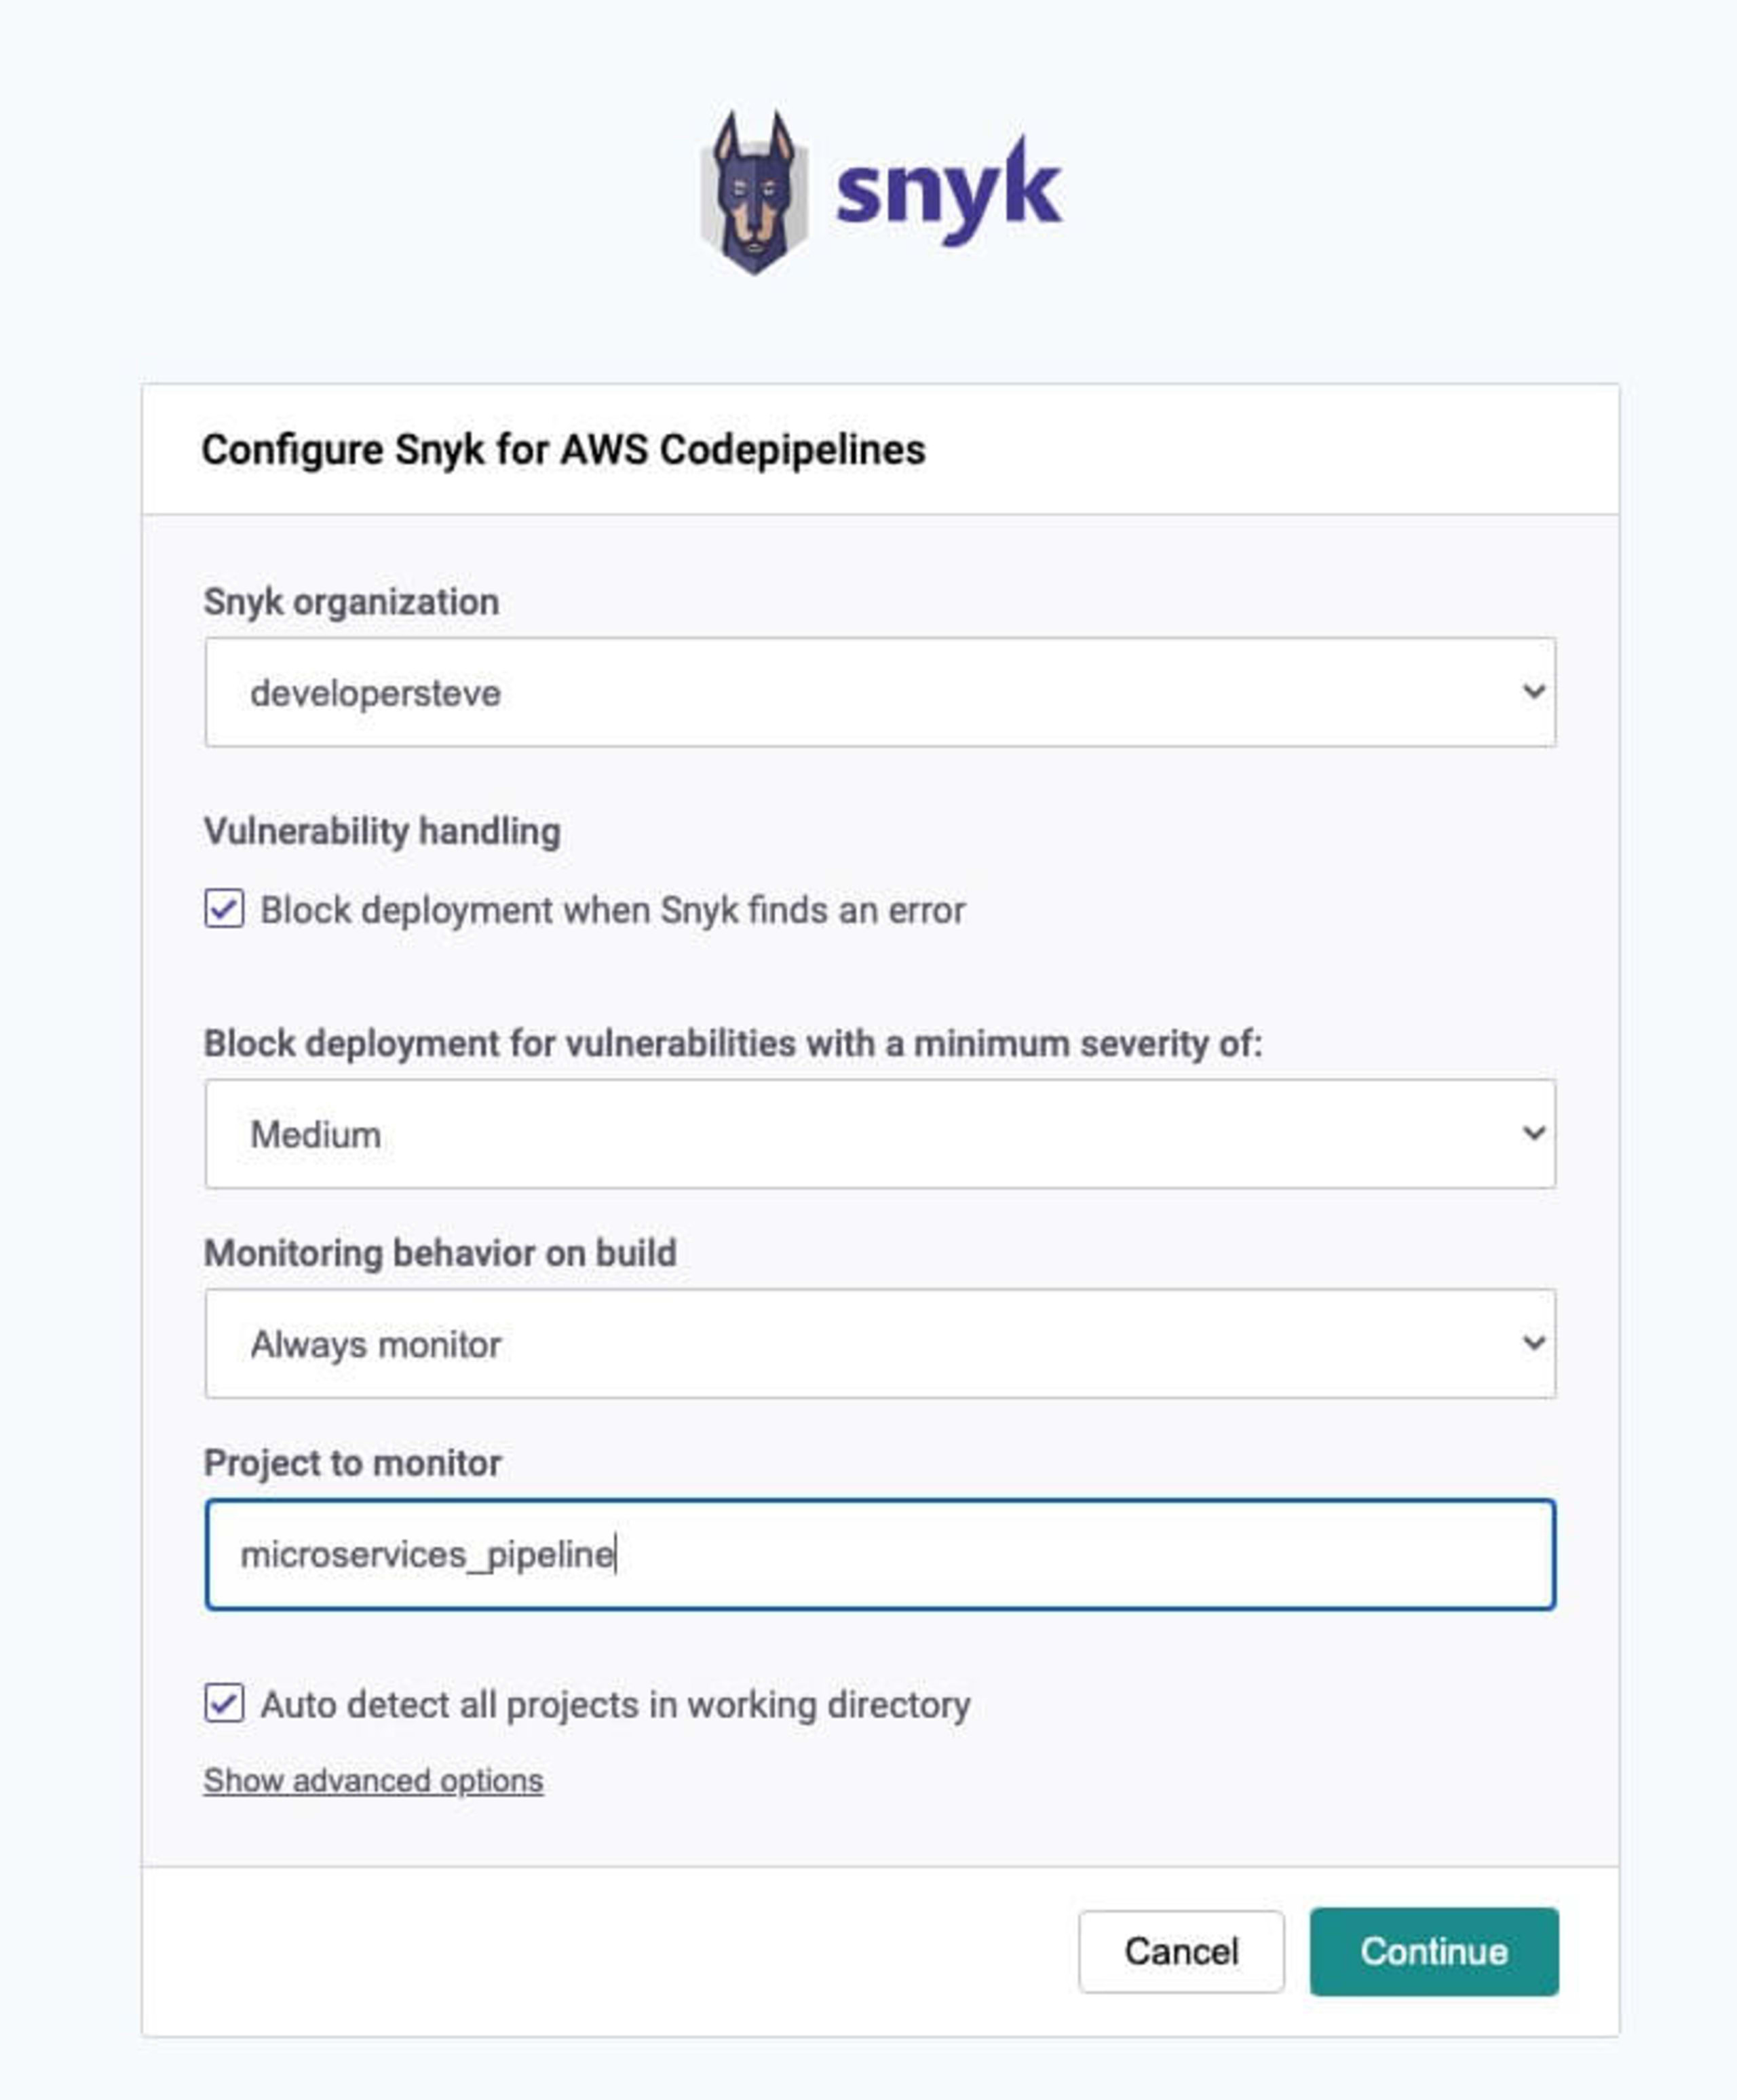
Once logged in it will then bring you back to the Snyk AWS CodePipelines configuration. Here is where we can set the organization and set the gate controls for blocking when a vulnerability is found and the severity type.
Click Continue once everything is set which will take you back to the edit action page, finally enter a name for the output artifacts and optional namespace fields and click Done.
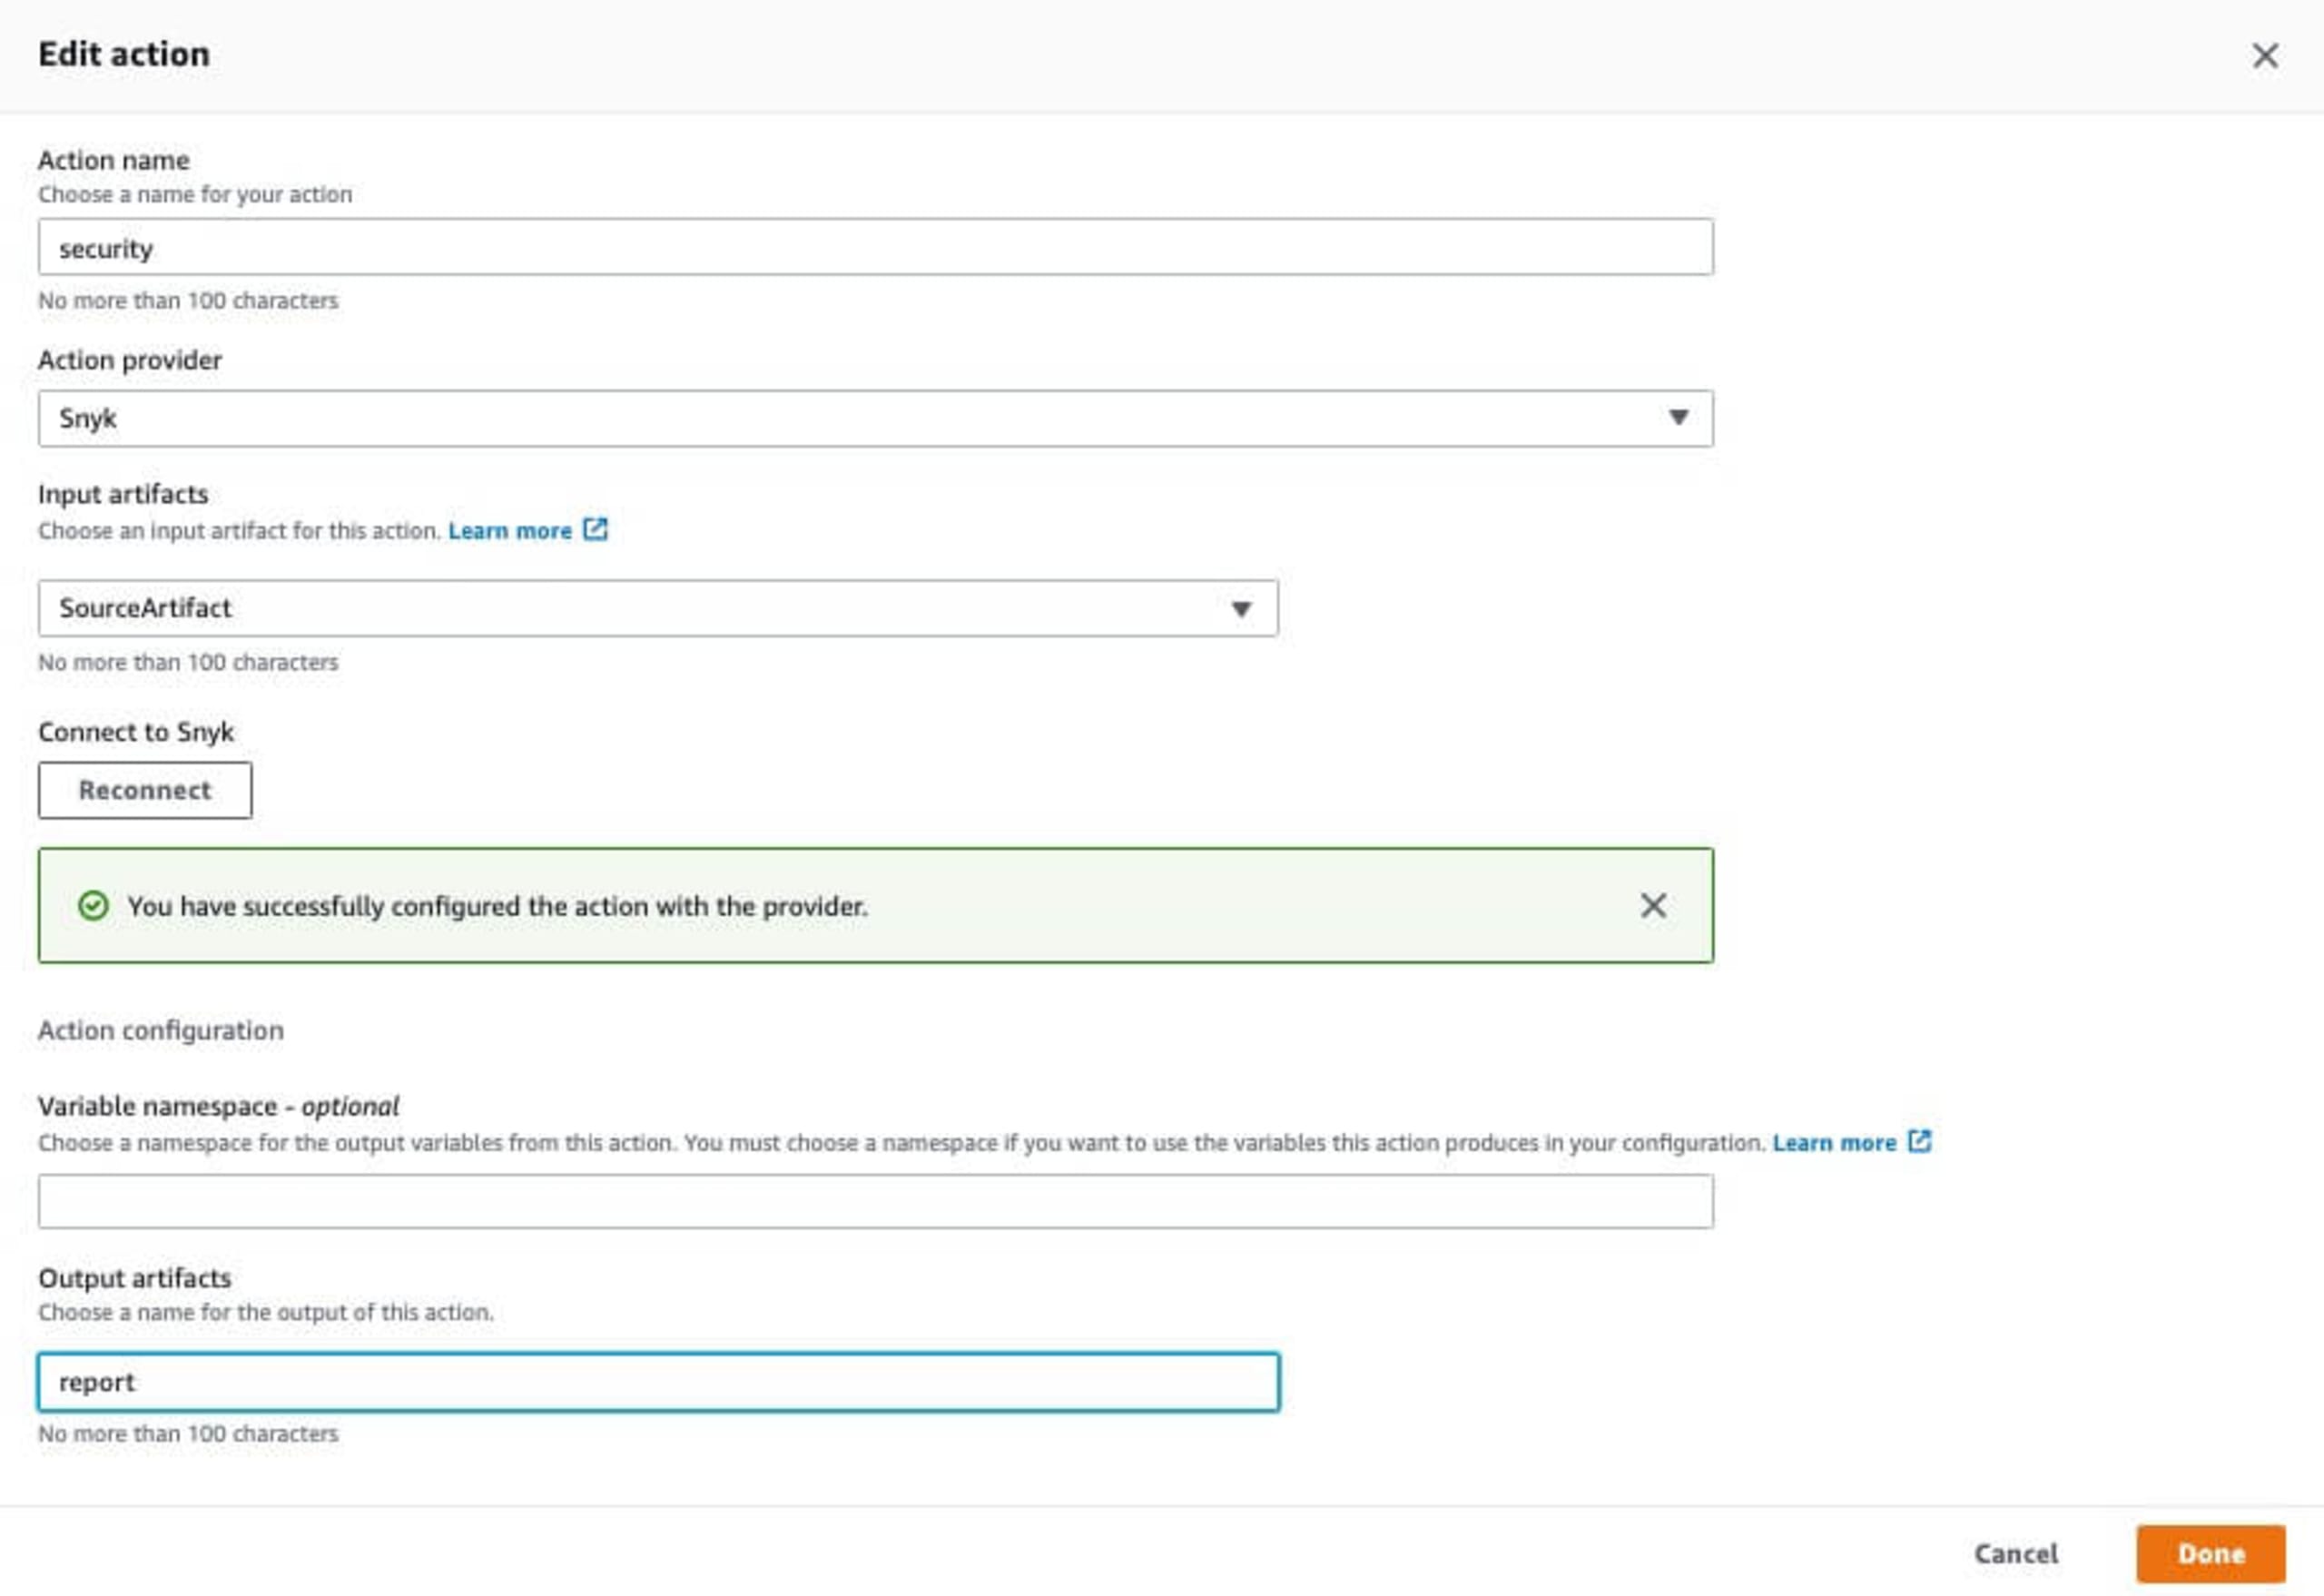
Then don't forget to hit the Release Change button to put the change into production, this will then rerun the deployment flow and scan the code as it deploys.

Like in the previous example of the direct repository scan, all logs from the scan are stored which is handy for PCI compliance reviews. To read more on AWS CodePipeline integrations have a look at this blog post on Automating vulnerability scanning in AWS CodePipeline with Snyk.
Secure your cloud infrastructure for free with Snyk
PCI compliance checks is a very important task performed once a year by a third-party accreditation organization. While the process is quite detailed and can be time consuming, having the right checks and logs in place will help speed up the process — and more importantly — keep your app, platform, and users safe.
Get started with securing your code with a free Snyk plan — which includes scanning your containers and IaC with automated remediations of vulnerable base images and dev-friendly fix guidance for IaC misconfigurations in-line with code.
ソースからインフラを保護する
Snyk は、IaC のセキュリティとコンプライアンスをワークフローで自動化し、ドリフトしたリソースや不足しているリソースを検出します。
