Oops I built a feature and created an Open Redirect Vulnerability in a Deno app
We will take a step-by-step approach to setting up a simple Deno "Hello World" web application, an increasingly popular runtime for JavaScript and TypeScript. Specifically.
We will create a Deno web application that supports a redirect query parameter and learn how developers may inadvertently open security holes when they follow roadmap plans and build features.
Getting started with a Deno “Hello World” code tutorial
As pre-requisite requirements, ensure you have access to a Deno web development environment with the required tooling to run Deno projects and interact with the web application.
Follow these steps to create your Deno "Hello World" application:
1. Install Deno on your development environment. If you haven't done so already, you can find the installation instructions on the [official Deno website](https://deno.land/#installation).
2. Create a new Deno project. Do this by creating a new directory and initializing it with a deps.ts file. This file will hold our dependencies, although we won't have any since this is a simple application.
   ```bash
    mkdir deno-hello-world
    cd deno-hello-world
    echo "" > deps.ts
    ```
3. Create a new server.ts file. This file will hold our server logic. In this file, we'll import the serve function from the std/http module, set up a server, and listen for incoming requests.
4. Add the server logic. In the server.ts file, add the following code:
    ```typescript
import { serve } from "https://deno.land/std/http/server.ts";

const httpHandler = async (request: Request): Promise<Response> => {

    let bodyContent = 'Hello World';

    return new Response(bodyContent, {
        status: 200,
        headers: {
            "content-type": "text/html"
        }
    })
};

serve(httpHandler, { hostname: "0.0.0.0", port: 8080 });
console.log("HTTP server is running on http://localhost:8080/");
```
5. Run the server. Save the server.ts file and start your server by running the following command in your terminal:
    ```bash
    deno run --allow-net server.ts
    ```
That's it! You now have a simple Deno web application that displays "Hello World!"
Request redirect in a Deno application
Let’s update the working code above to support a query parameter from the main / index route to a /user route that displays the user’s details.
First, add the second /user route. To avoid introducing any substantial dependency or web frameworks we’ll use a simple conditional check on the requested path.
Update the httpHandler code as follows:
```typescript
const httpHandler = async (request: Request): Promise<Response> => {
    let bodyContent = 'Hello World';

    const requestURL = new URL(request.url);
    if (requestURL.pathname === "/user") {
        bodyContent = `
        <h1> User: admin </h1>
        <ul>
          <li> Name: Roberto </li>
          <li> Email: roberto@example.com </li>
        </ul>
        `
        return new Response(bodyContent, {
            status: 200,
            headers: {
                "content-type": "text/html"
            }
        })
    } else {
        return new Response(bodyContent, {
            status: 200,
            headers: {
                "content-type": "text/html"
            }
        })
    }
};
```
Now, we’re ready to implement a redirect feature so that when requests to /?redirect=/user are sent, our web application parses the query parameter redirect and redirects the request to the user details page handling.
At the top of our httpHandler function let’s expand the requestURL variable to also include a conditional check for the redirect query parameter and act accordingly by responding with an HTTP response that includes a Location redirect header:
```js
    const requestURL = new URL(request.url);
    const redirectTo = requestURL.searchParams.get('redirect');
    if (redirectTo) {
        return new Response(null, {
            status: 302,
            headers: {
                'location': redirectTo
            }
        })
    }
```
To test that our redirect feature works as expected, redirect to the user details page from the main index page by requesting the page: /?redirect=/user. Here it is in action by using curl:
```bash
@lirantal ➜ /workspaces/deno-open-redirect-vulnerability-blog-post (main) $ curl "http://localhost:8080/?redirect=/user" -vv
v
*   Trying ::1:8080...
* connect to ::1 port 8080 failed: Connection refused
*   Trying 127.0.0.1:8080...
* Connected to localhost (127.0.0.1) port 8080 (#0)
> GET /?redirect=/user HTTP/1.1
> Host: localhost:8080
> User-Agent: curl/7.74.0
> Accept: */*
>
* Mark bundle as not supporting multiuse
< HTTP/1.1 302 Found
< location: /user
< vary: Accept-Encoding
< content-length: 0
< date: Mon, 06 Nov 2023 14:19:36 GMT
<
* Connection #0 to host localhost left intact
```
Ready to ship to production?
You might want to take a closer look…
Open redirect security vulnerability in a Deno application
An Open Redirect Vulnerability, also known as Unvalidated Redirects and Forwards, is a significant security flaw commonly seen in web applications. This vulnerability can lead to severe cybersecurity issues such as phishing attacks, credential theft, and malicious content delivery.
I highly recommend visiting the Snyk Learn lesson on Open Redirect to get more insights and details on secure coding best practices in JavaScript and other languages such as Java, Python, etc.
What is an open redirect vulnerability?
An Open Redirect Vulnerability occurs when an application takes a parameter and redirects a user to the parameter value without any validation. This vulnerability can allow a cyber attacker to redirect victims from the original website to a malicious site of their choosing. Here's a simple example of how an open redirect might look in a Node.js application:
```javascript
app.get('/dashboard, function(req, res){
    var redirect = req.query.redirect;
    res.redirect(redirect);
});
```
In a Deno project, it looks similar:
```javascript
const httpHandler = async (request: Request): Promise<Response> => {
    const requestURL = new URL(request.url);
    const redirectTo = requestURL.searchParams.get('redirect');
    if (redirectTo) {
        return new Response(null, {
            status: 302,
            headers: {
                'location': redirectTo
            }
        })
    }
});

serve(httpHandler);
```
In the above code, the application redirects the user to the URL in the query parameter redirect. An attacker could abuse this by providing a malicious URL as the target, redirecting the user to an unintended destination.
If you need a full working example of the Deno application code we’ve put together you can find it here: https://github.com/snyk-snippets/deno-open-redirect-vulnerability-blog-post
Exploiting an open redirect vulnerability
In our simple Deno web application, a malicious user may abuse the redirect feature by crafting a link such as:
```
https://example.com/?dummyParameter1=value1&dummyParameter2=value2&redirect=https://attacker.com/
```
Using a dummy query parameter such as dummyParameter1 doesn’t impact the actual Deno application code but it creates a longer URL and as such it is harder for users to notice the redirect parameter and its value being a red flag.
Furthermore, malicious users can hide their intent by using URL shortening services. Unsuspecting users most likely wouldn’t unfurl the URL to find out the URL being redirected to.
How Snyk can detect an open redirect vulnerability in your Deno web app
Snyk is a powerful developer-first security tool that can help identify and fix vulnerabilities in your codebase and open-source dependencies. It's particularly useful in detecting security weaknesses like open redirect vulnerabilities.
Currently, Snyk supports TypeScript and Node.js projects but not Deno specifically. That said, if you’re building apps with JavaScript you’d want to scan both your package.json file for vulnerable open source dependencies and your own JavaScript code which may introduce code insecurity such as this Open Redirect vulnerability.
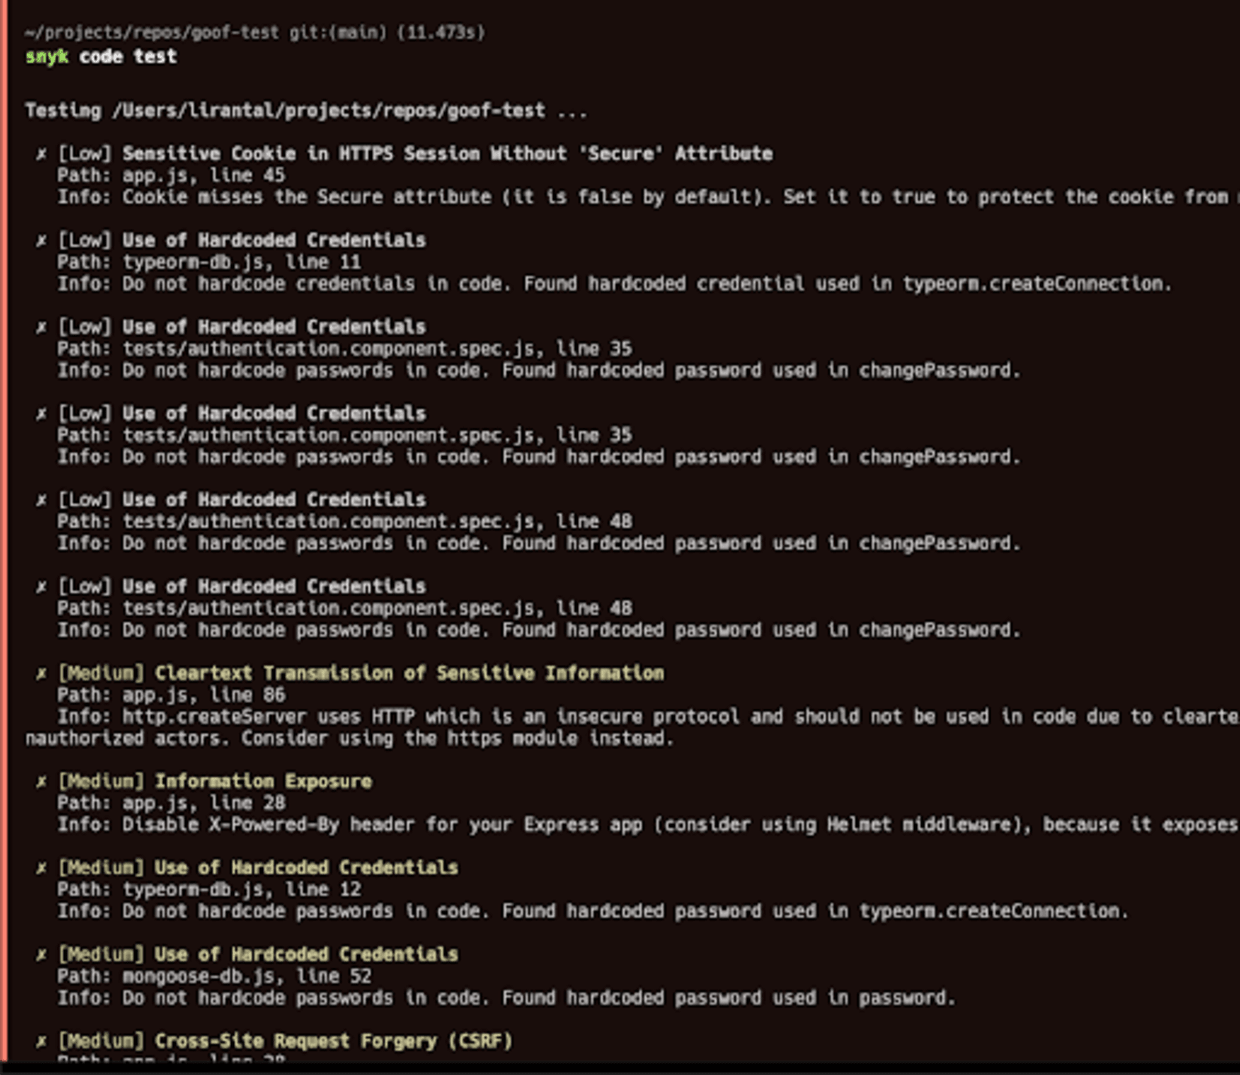
To detect an open redirect vulnerability in a JavaScript application with Snyk, you need to integrate Snyk into your development and deployment pipeline. You can do this by installing Snyk CLI and running the Snyk test against your JavaScript, TypeScript or Node.js application. Here's an example of how to do it:
1. Install Snyk CLI globally:
```bash
npm install -g snyk
```
2. Run the Snyk test in your application directory:
```bash
snyk code test
```
Snyk will then scan your application code and report any vulnerabilities it finds, including open redirect vulnerabilities. It also provides detailed information on how to fix the vulnerabilities, making it an essential tool for maintaining a secure application.

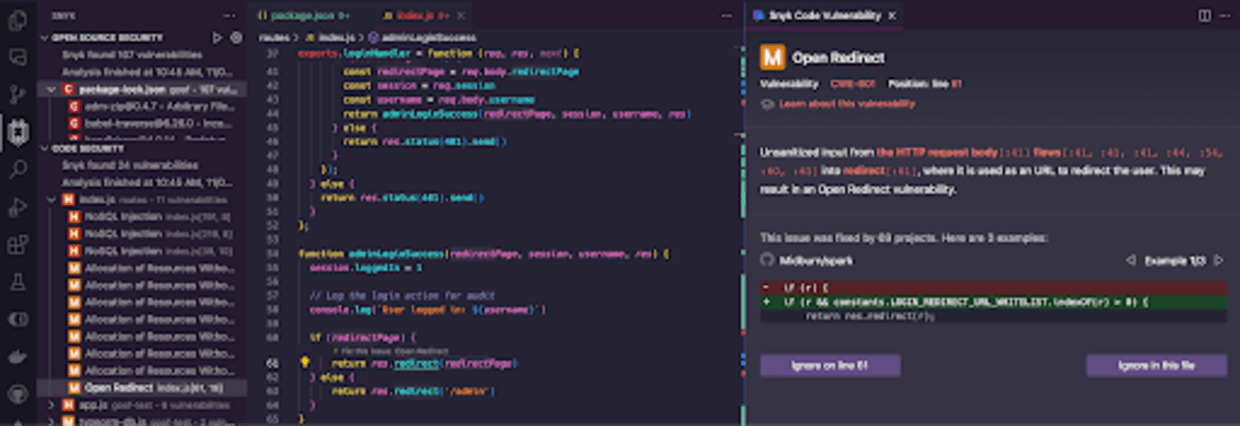
In fact, Snyk can find insecure code vulnerabilities right in the IDE, while you’re writing the code. In the following Node.js web application code written using the Express library and using a controller middleware to redirect the user after the admin user logs in, we can see Snyk finds many security vulnerabilities, one of which is an open redirect security issue.
On the right pane, you can see Snyk providing insights on the open redirect vulnerability:
Explaining how unsanitized input flows between different files and code paths, detailing the specific line of code that is vulnerable.
Providing a link to learn about this open redirect vulnerability (find the Snyk Lesson here!)
Several code examples of how this open redirect vulnerability was fixed in other open-source projects and provide you with the code diff.

Remember, prevention is always better than cure, especially in cybersecurity. By understanding the open redirect vulnerability and using tools like Snyk, you can ensure your web applications remain secure and trustworthy.
Configuring the Deno Dev Container
In this section, we'll look at the configuration of the Deno development container within GitHub Codespaces. This will involve the modification of specific configurations such as the postCreateCommand and the forwardedPorts in the devcontainer.json file. Throughout this section, we'll provide some practical examples and suggestions to guide you in setting up a functional Deno web application in your development environment.
Use a Dev Container postCreateCommand Configuration
The postCreateCommand in the devcontainer.json file is a command or series of commands run after the development container has been built and started. This configuration is important because it allows you to automate tasks that you typically perform manually every time you start your container.
For example, you could use the postCreateCommand to install project dependencies, build your project, or start your application server.
For a Deno project, you can use the postCreateCommand to auto-start the web application inside the development container: Here's an example of what your postCreateCommand configuration might look like:
```json
{
  "postCreateCommand": "deno run --allow-net server.ts"
}
```
Forwarded Port Configuration in Deno
Since this isn’t just a command-line Deno program but an actual web application, we need to expose ports that the Dev Container is hosting requests for and which the host environment should be able to access. This is where the forwarded ports configuration of a Dev Container comes in.
The forwardedPorts configuration in the devcontainer.json file specifies which ports in the container should be exposed to the host machine.
For instance, the Deno web application we outlined in this article listens on port 8080, then we need to forward this port to the host machine using the forwardedPorts configuration.
To set up a forwarded port configuration for your Deno web app, add the forwardedPorts configuration to your devcontainer.json file. Here is an example:
```json
{
  "forwardedPorts": [8080]
}
```
Now, your Deno web application is running on port 8080 in the container, and you can access it at http://localhost:8080 on your host machine. Remember, if you’re running this in a remote cloud environment such as GitHub Codespaces, then you’d need to access it via the Codespace URL itself such as https://orange-invention-pe8918638bd1nf81-8080.app.github.dev/
What’s next?
We learned about Deno, Dev Containers, and most importantly, how to avoid introducing a security vulnerability when building a feature. Phew, that was a lot!
You can find the full working code of this article on the Snyk Snippets code repository at GitHub: https://github.com/snyk-snippets/deno-open-redirect-vulnerability-blog-post
無料で Snyk を使ってみる
クレジットカードは必要ありません。
Bitbucket やその他のオプションを使用してアカウントを作成
Snyk を利用することにより、当社の利用規約およびプライバシーポリシーを含め、当社の規程を遵守することに同意したことになります。