Secure your build workflow on Bitbucket Pipes with Snyk
Noa Korem
5. März 2019
0 Min. LesezeitWe are excited to announce that Snyk now integrates with Bitbucket Pipes, which allows Bitbucket users to secure their continuous integration/continuous delivery (CI/CD) workflow by finding, fixing and monitoring open-source vulnerabilities (vulns) in their application or docker image dependencies. With this release, Snyk is proud to be a Bitbucket Pipes launch partner.
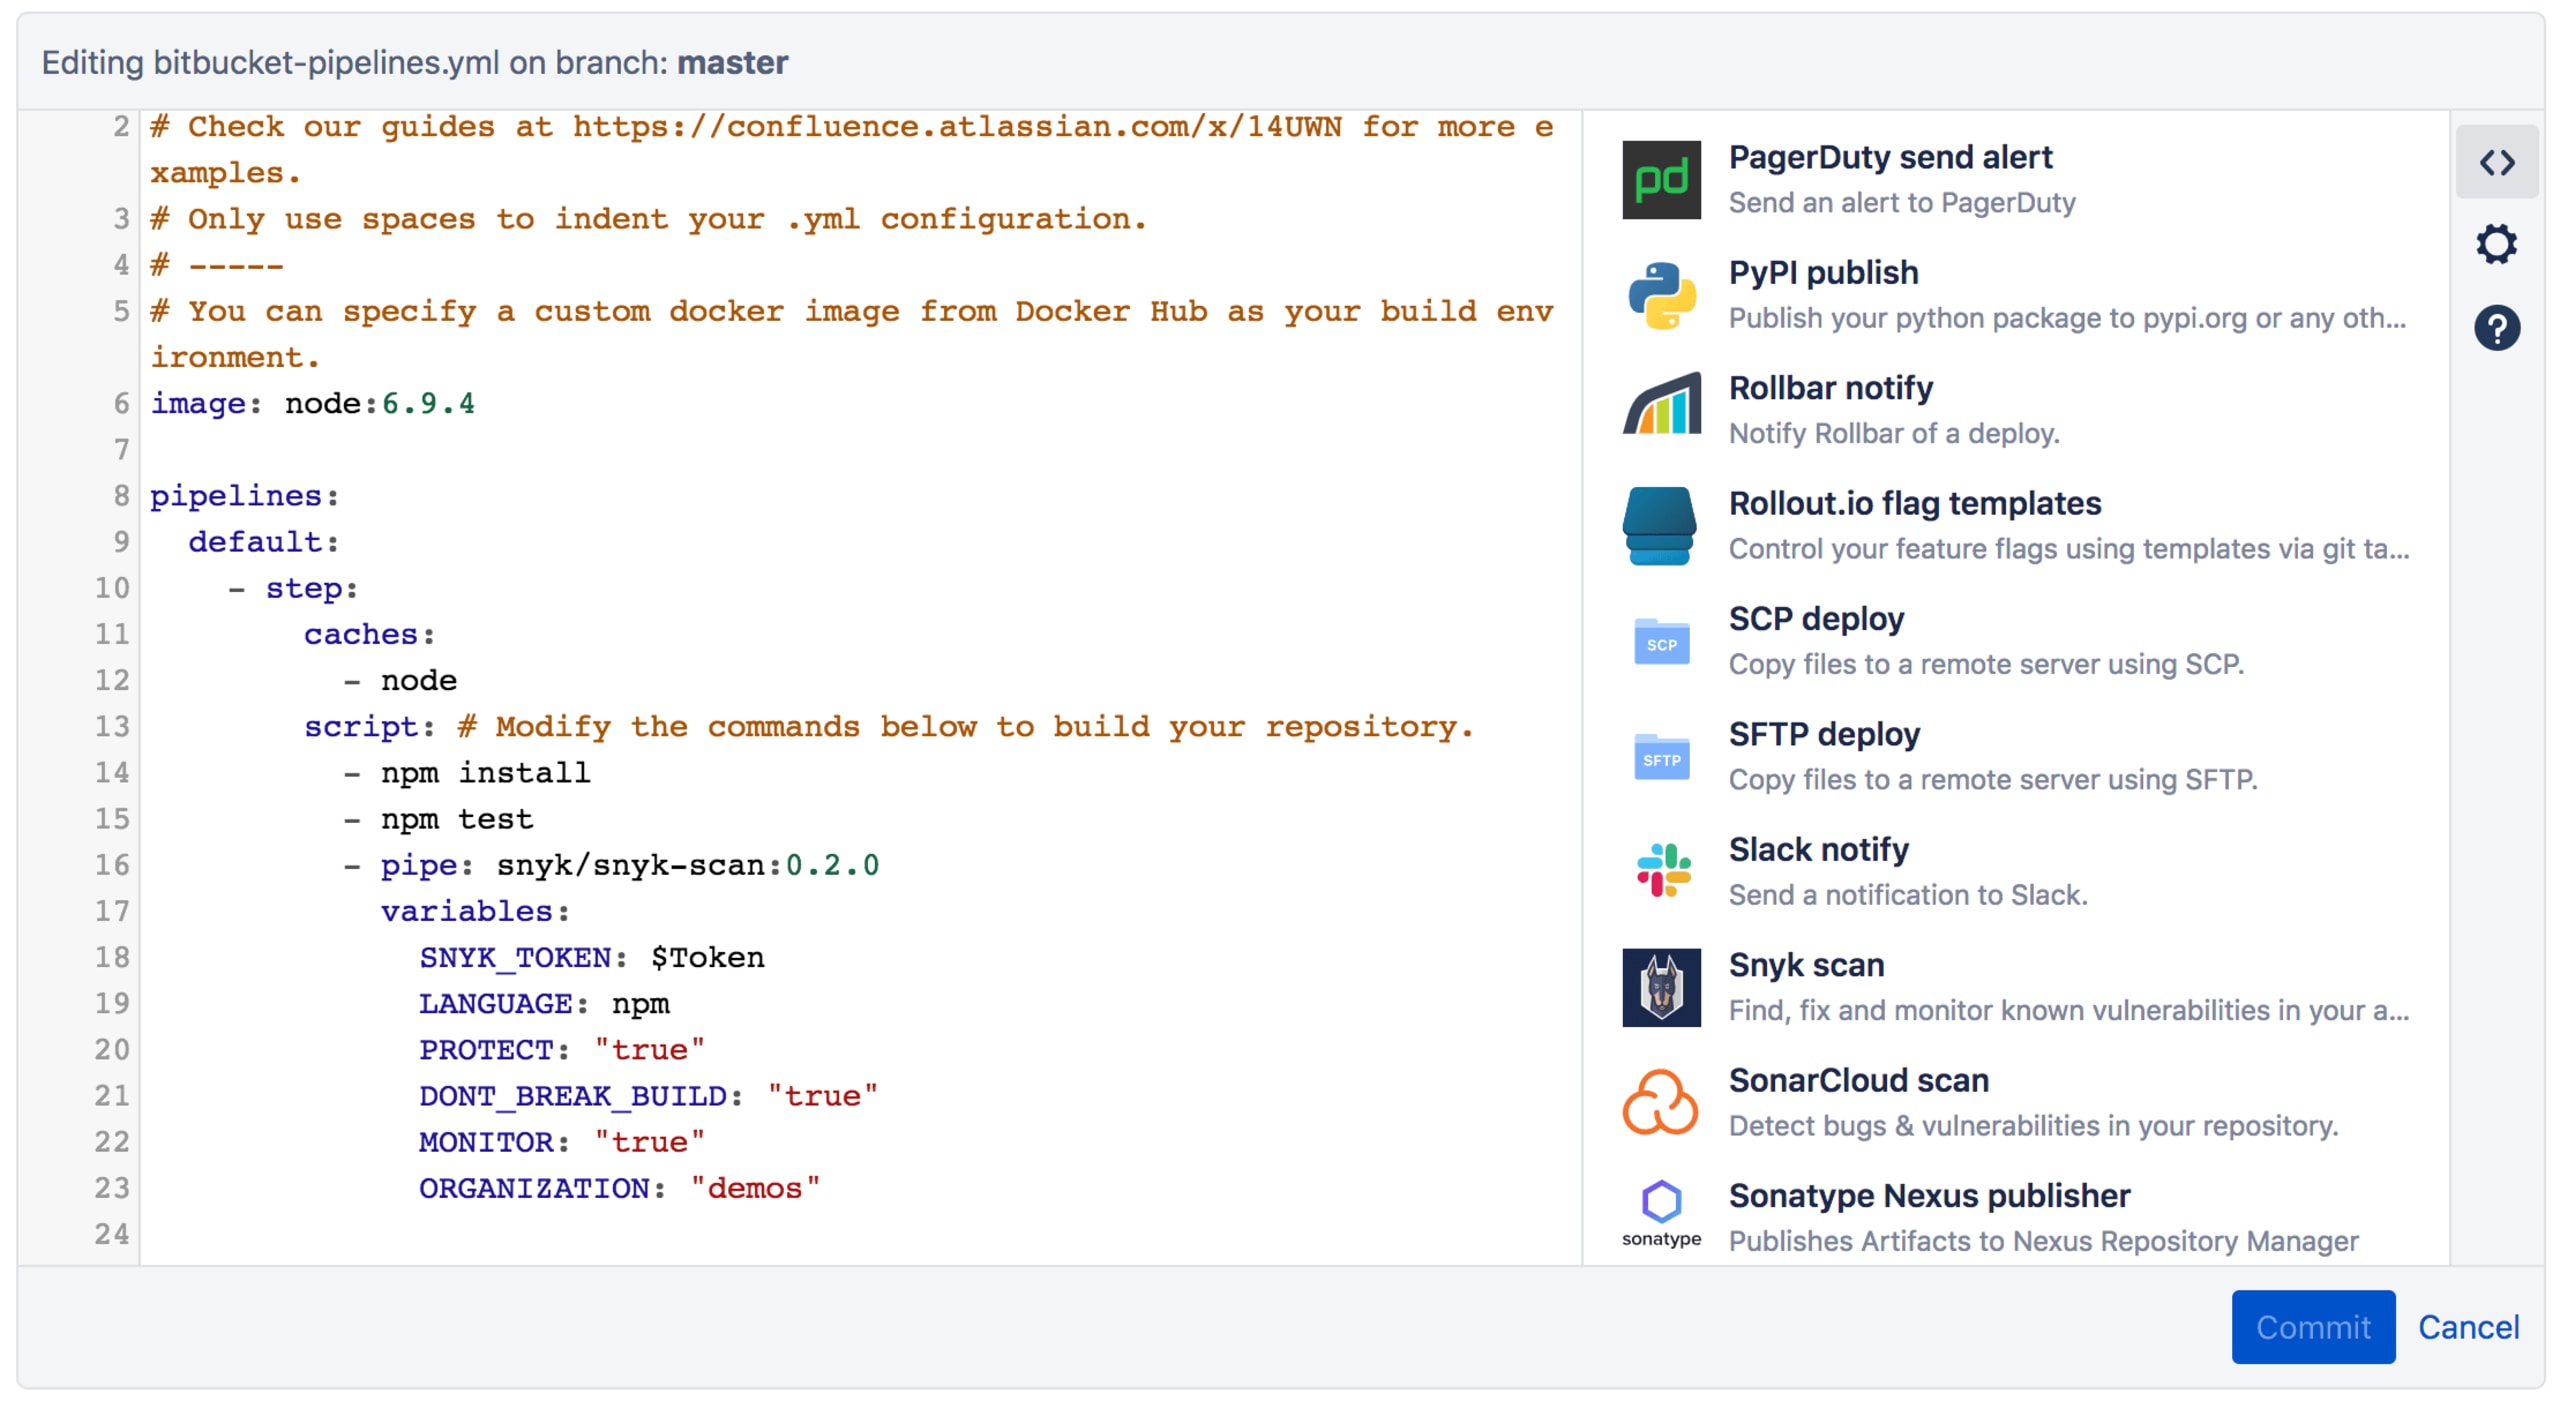
Last week, Atlassian launched Bitbucket Pipes which allow users to customize and automate a CI/CD workflow from a group of ready-to-use tasks. The pipeline can be set up with pre-defined actions that are integrated into the workflow in a repeatable manner. To add a pipe to your workflow, simply copy the relevant pipe and paste it into the pipeline, as seen in the image below:

Finding, fixing and monitoring open-source vulnerabilities in your app.
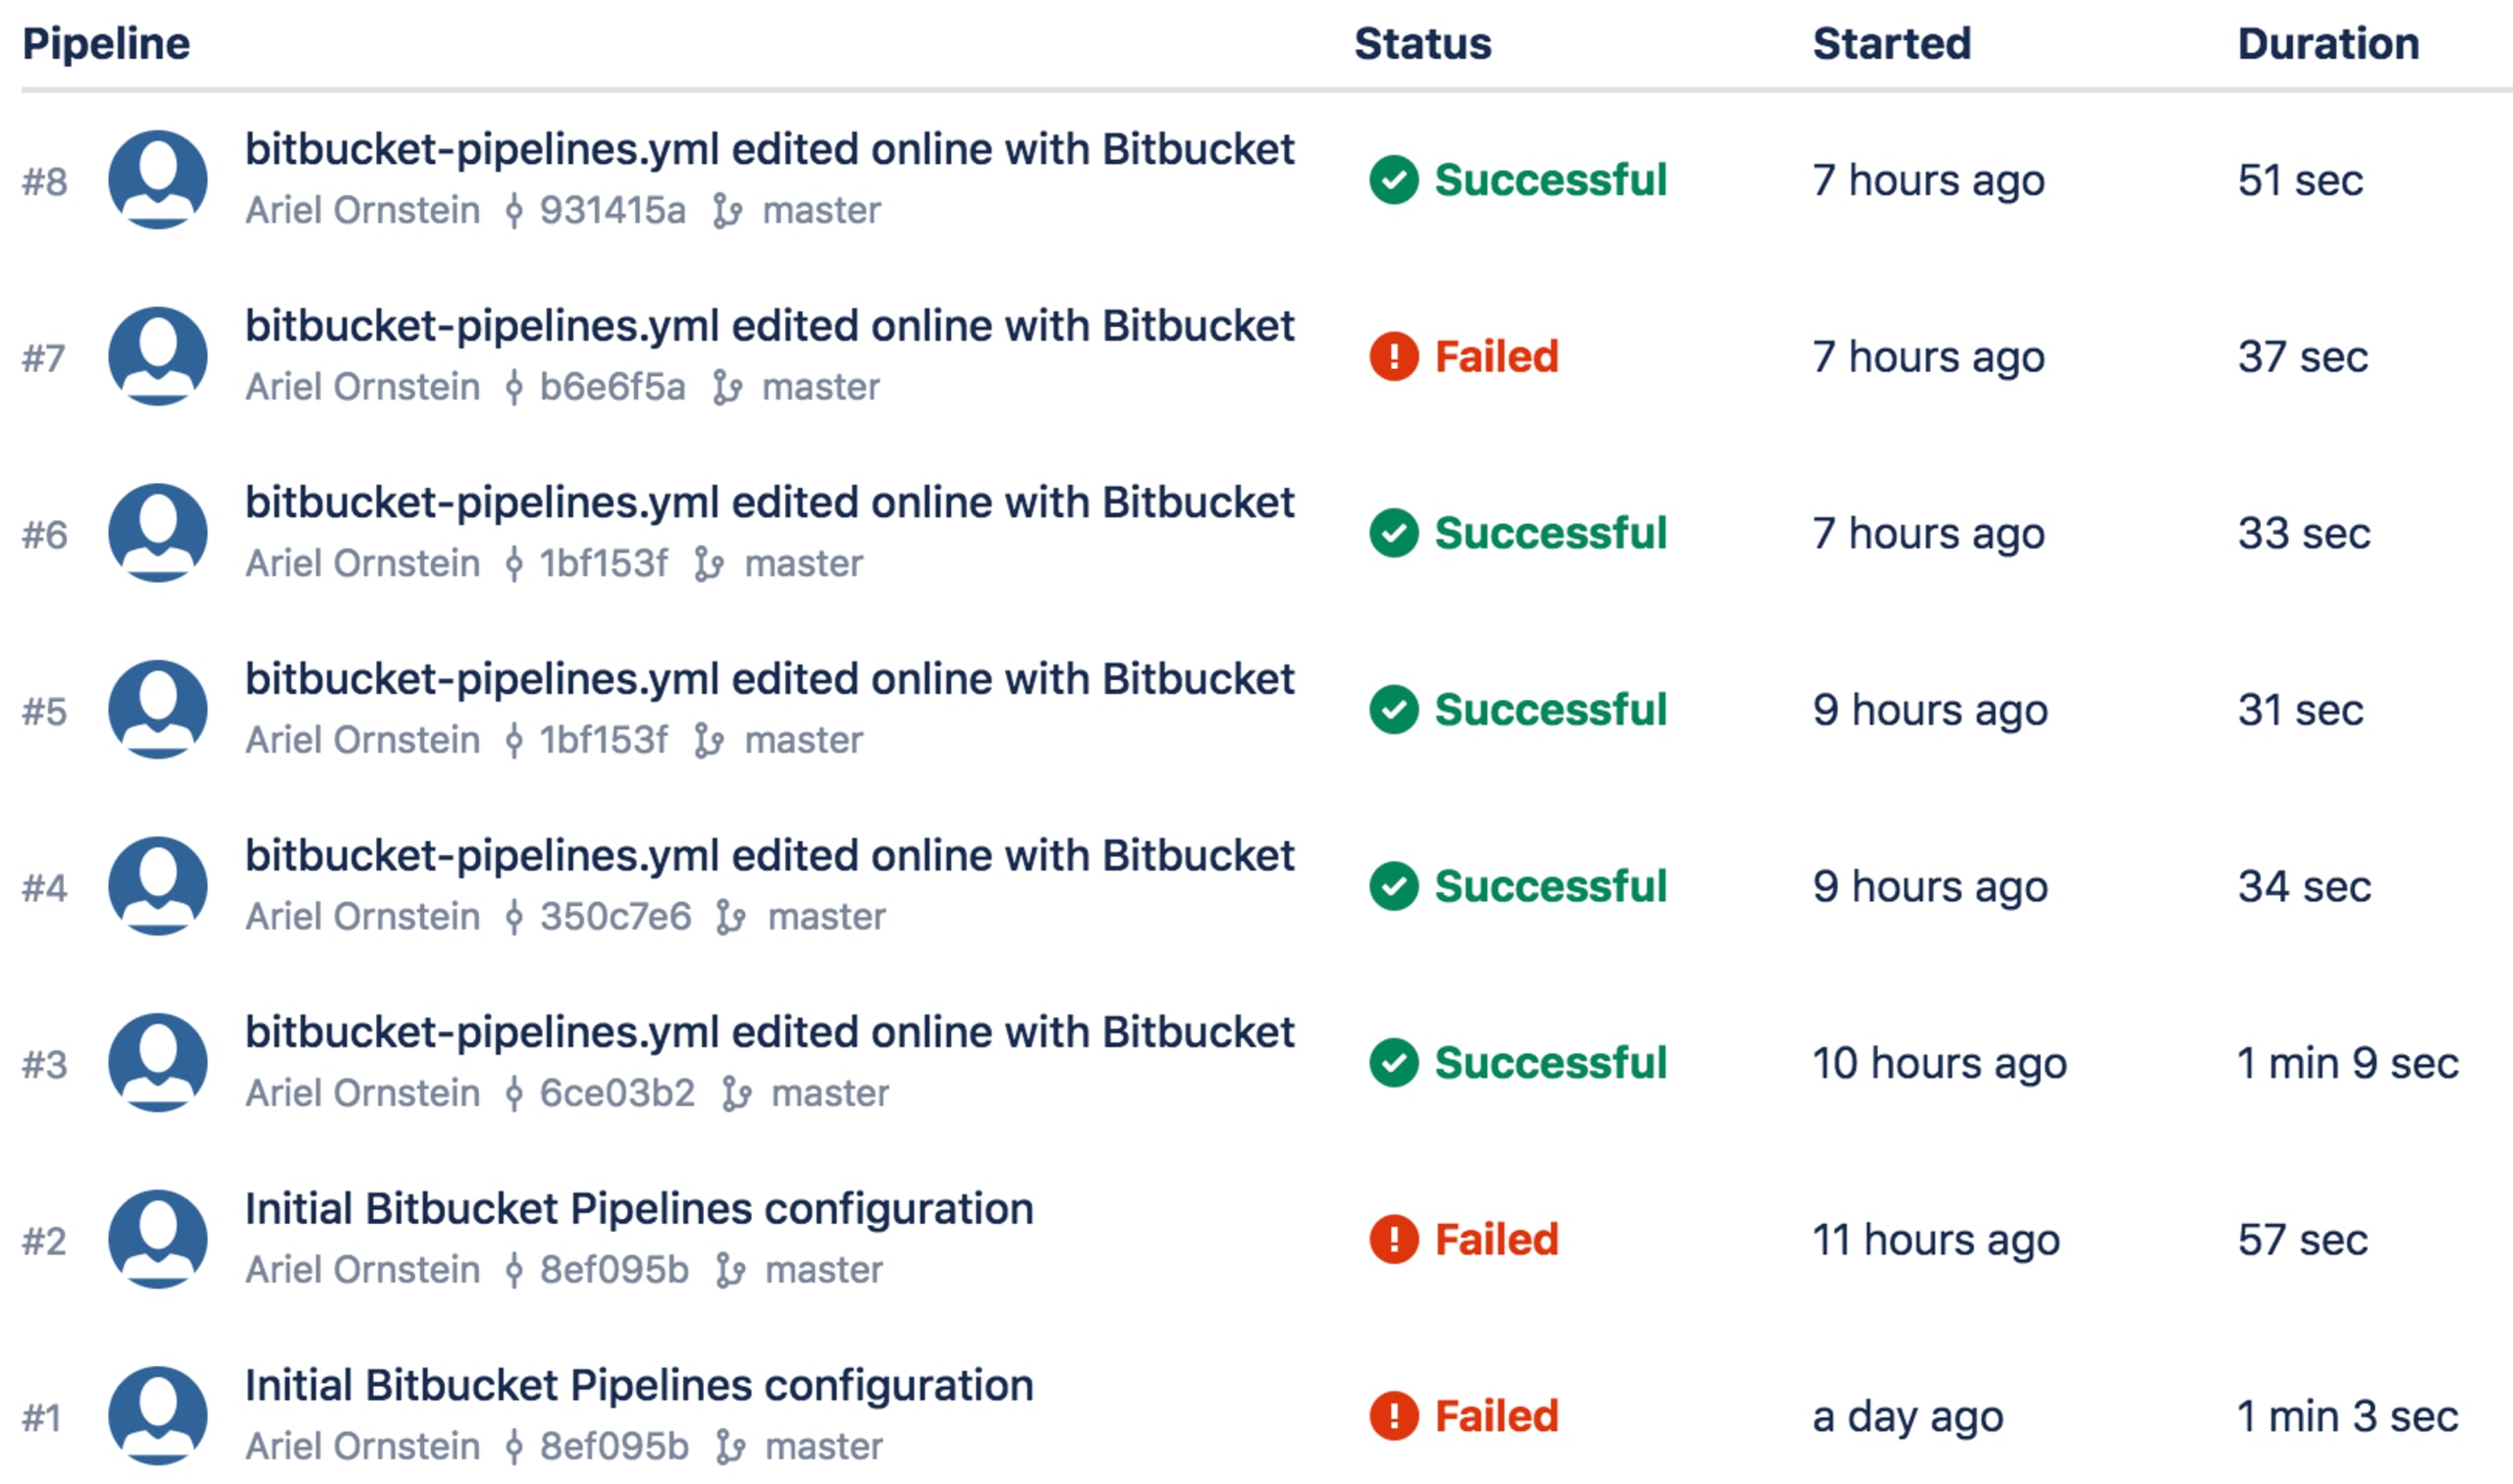
Once added to the Bitbucket Pipeline workflow, the Snyk pipe scans your dependencies for open source vulnerabilities as part of the CI/CD workflow. If vulnerabilities are found, the Snyk pipe gates the process according to the configuration set by the user. For example, preventing high severity vulnerabilities from going through the build as seen in the image below:

For vulnerabilities that are found, the Snyk pipe includes a patch module that can fix vulnerabilities using Snyk’s precision patches. These patches are developed and rigorously tested in collaboration with the package owner. Snyk backports the original fix to all applicable historical versions, without introducing code breaks.
Once the test succeeds, the deployed code is monitored by Snyk for new vulnerabilities. When a new relevant vulnerability is discovered, Snyk notifies its users in order to minimize the exposure window. Snyk’s vulnerability database is constantly updated with new vulnerabilities to ensure the best coverage for our users.
Securing your Docker images
The Snyk pipe can also scan Docker images for operating system vulnerabilities. Snyk scans the base image and the additional layers, and detects the vulnerabilities associated with each layer and with the base image. Snyk offers remediation advice, directing users to the most secure base image alternative, which eliminates a large number of vulnerabilities and minimizes risk of code breaks.
Securing your entire Bitbucket workflow
Snyk offers a comprehensive security interface to the different Bitbucket solutions across the development workflow:
Starting with source code management where every pull request is scanned and fix pull requests are populated with the recommended upgrades.
In the pipeline, where Snyk prevents deployment of vulnerable apps with CI/CD integration.
Finally, after deployment, Snyk saves a snapshot of the dependencies of the deployed app, monitoring and sending notifications for new issues.
Snyk will be participating in the upcoming Atlassian summit (April 9-11 in Las Vegas) and showcasing its full solution for Bitbucket. Stop by our booth located at booth 102 or book a meeting here.
How to add a Snyk pipe
To enable Snyk to scan your dependencies for vulnerabilities, add the Snyk pipe into your bitbucket-pipelines.yml, indicating a Snyk API Token (from your account settings) and setting the package manager/language (for example “npm”). See below the Snyk Pipe snippet:

Following is an example of the Snyk pipe, identifying npm as the package manager:
1script:
2 – npm install
3 – npm test
4 – pipe: snyk/snyk-scan:0.2.0
5   variables:
6     SNYK_TOKEN: $SNYK_TOKEN
7     LANGUAGE: “npm”
8– npm publish
Once included in your pipes, Snyk looks for the manifest files (package.json, package-lock.json) and performs the scan.
Note: you should always add the Snyk pipe as a step that occurs after any install/build steps, for example: `npm install`, `dotnet restore`, `docker build` etc.
There are also two additional functionalities that you can add to the pipe:
PROTECT - applies Snyk patches based on.snyk policy file which is generated by the wizard beforehand.
MONITOR - If the test didn’t fail, This will record a snapshot of the app’s dependencies on snyk.io and allow you to see the state of your deployed code, be monitored and get alerts when new vulns are found in the code.
What about Docker?
Snyk also provides Docker image scanning, allowing you to test for vulnerabilities:
To scan Docker images, set the IMAGE_NAME parameter.
Setting TARGET_FILE: “Dockerfile” allows you to see remediation advice for the image.
When you add these commands, the pipe appears similar to the following:
1script:
2 – docker build -t $IMAGE_NAME .
3 – pipe: snyk/snyk-scan:0.2.0
4   variables:
5     SNYK_TOKEN: $SNYK_TOKEN
6     LANGUAGE: “docker”
7     IMAGE_NAME: $IMAGE_NAME
8     TARGET_FILE: “Dockerfile”
9 – docker push $IMAGE_NAME
Important optional variables include:
SEVERITY_THRESHOLD — limits Snyk to reporting higher severity vulnerabilities only
DONT_BREAK_BUILD — instructs Snyk to continue the build despite the vulns that it identified.
More documents can be found here.
